Game Time tips
Initialization
graph TD;
    A[Start Game] --> B{First Time or<br/>Load Save?}
    B -->|First Time| C{System Type?}
    B -->|Load Save| D[Initialize System<br/>from Data]
    C -->|Bounded| E[Initialize<br/>Bounded System]
    C -->|Infinite| F[Initialize<br/>Infinite System]
    E --> G[System Ready]
    F --> G
    D --> G
    G --> H[Gametime Functions<br/>Available]

    style D fill:#a5d6ff,stroke:#333,color:#000
    style E fill:#a5d6ff,stroke:#333,color:#000
    style F fill:#a5d6ff,stroke:#333,color:#000
You must initialize the system before any gametime functions will work. When starting the game for the first time, use either Initialize Bounded System or Initialize Infinite System. If you’re loading from a previous save, use Initialize System from Data. See Save and Load for details on initializing from saved data.
When using Initialize System from Data, the system type is determined by the saved data. If your data came from a bounded system, it will initialize as bounded, and vice versa for infinite systems.
-
Bounded System The gametime system functions will only work inside the bounded levels you define. You can place an empty level at any position where you don’t want existing placements. Starting with V5.1, you can apply different transforms to each bounded level, allowing some regions to be rotated by 45° while others maintain the default rotation. The only restriction is that bounded levels cannot overlap. There are also two override functions,
On Enter System BoundaryandOn Leave System Boundary, designed specifically for bounded systems. These will trigger your custom events whenever you enter or leave the system boundary during Move Preview. -
Infinite System Unlike the bounded system, all gametime system functions are available everywhere. The included levels will automatically transform to match the grid step based on your tile size, and placements inside these levels become interactable with your system (you can remove or replace them).
Binding events
To bind your gameplay logic and add visual or sound feedback, you can bind your custom events to the related delegates. Check out Gametime Subsystem Delegate.
Custom data binding
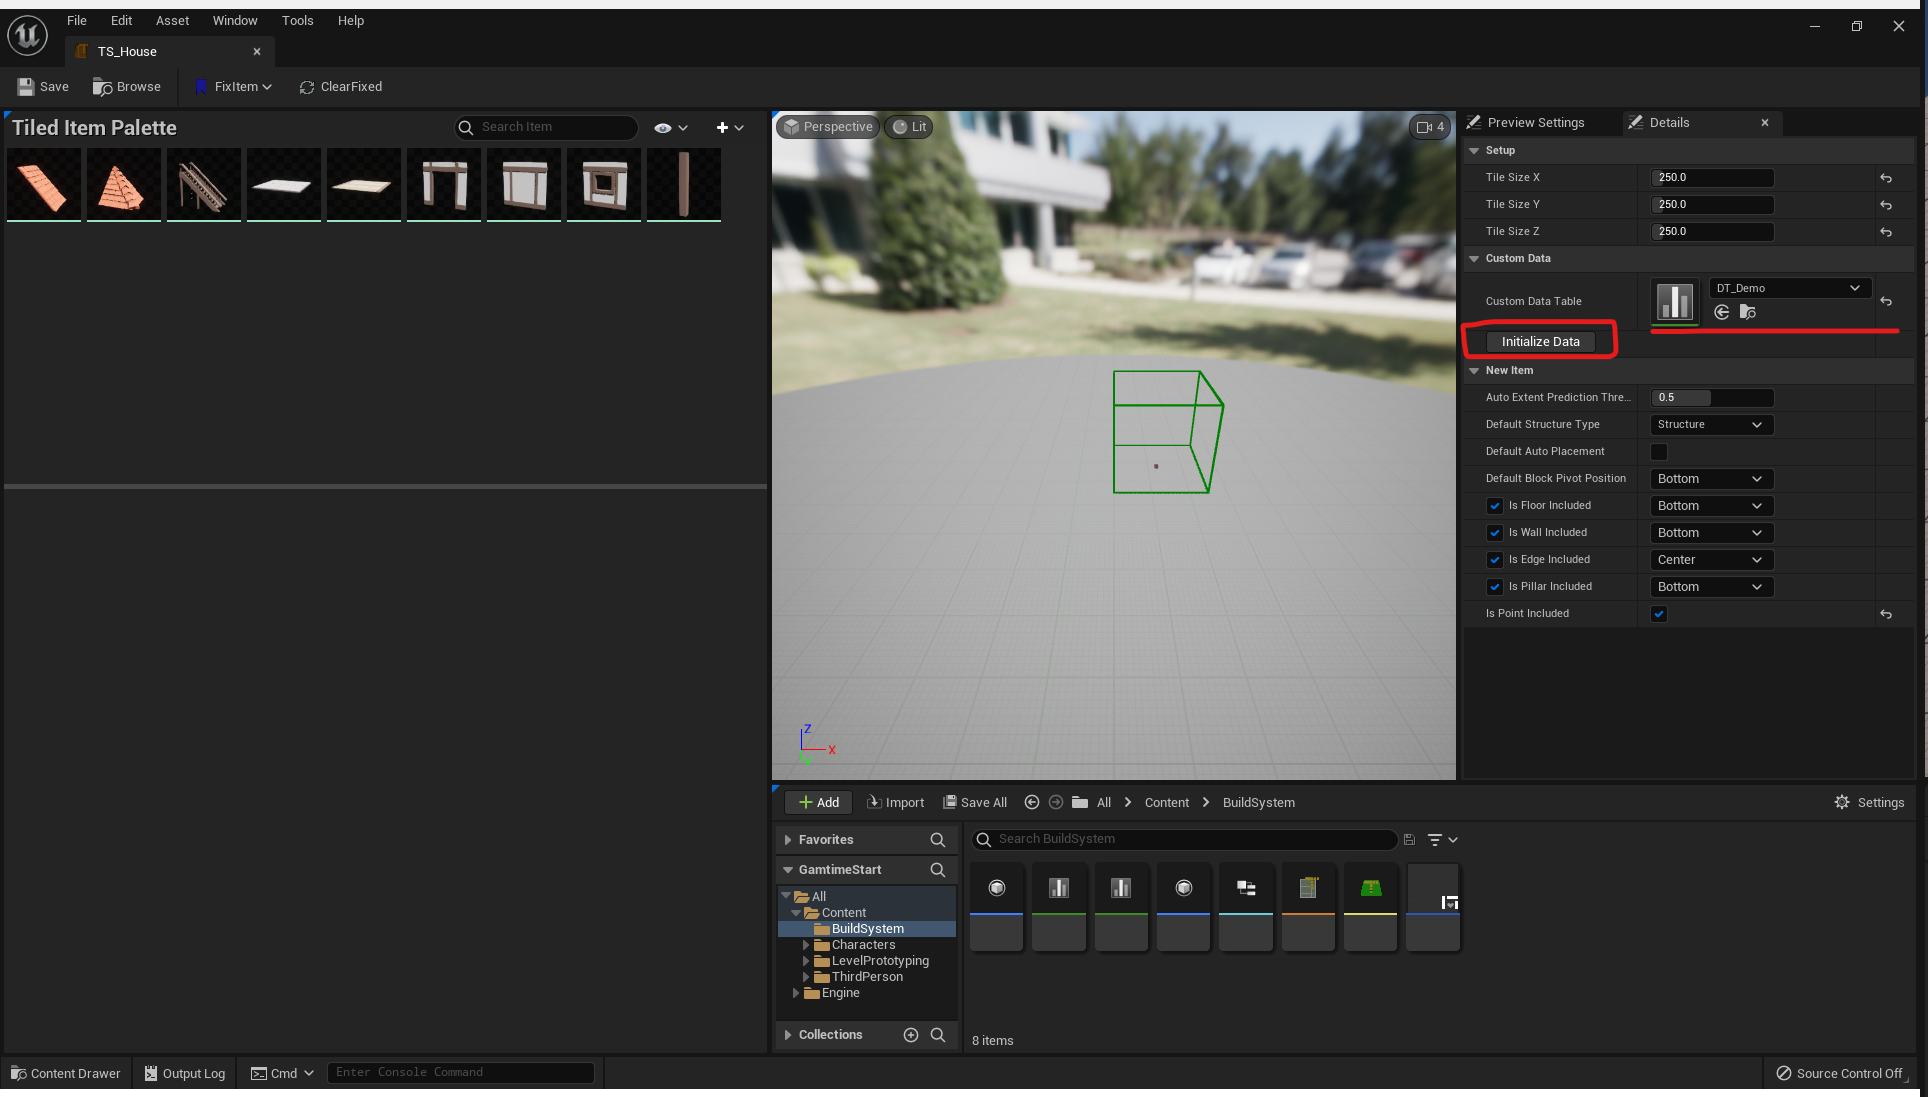
To support custom data binding, create a data table with a KEY variable that links to the tiled items in your tiled item set. This plugin provides an automatic approach to create this linkage. The GUID from each tiled item will become the RowName in your data table.
- Make linkage
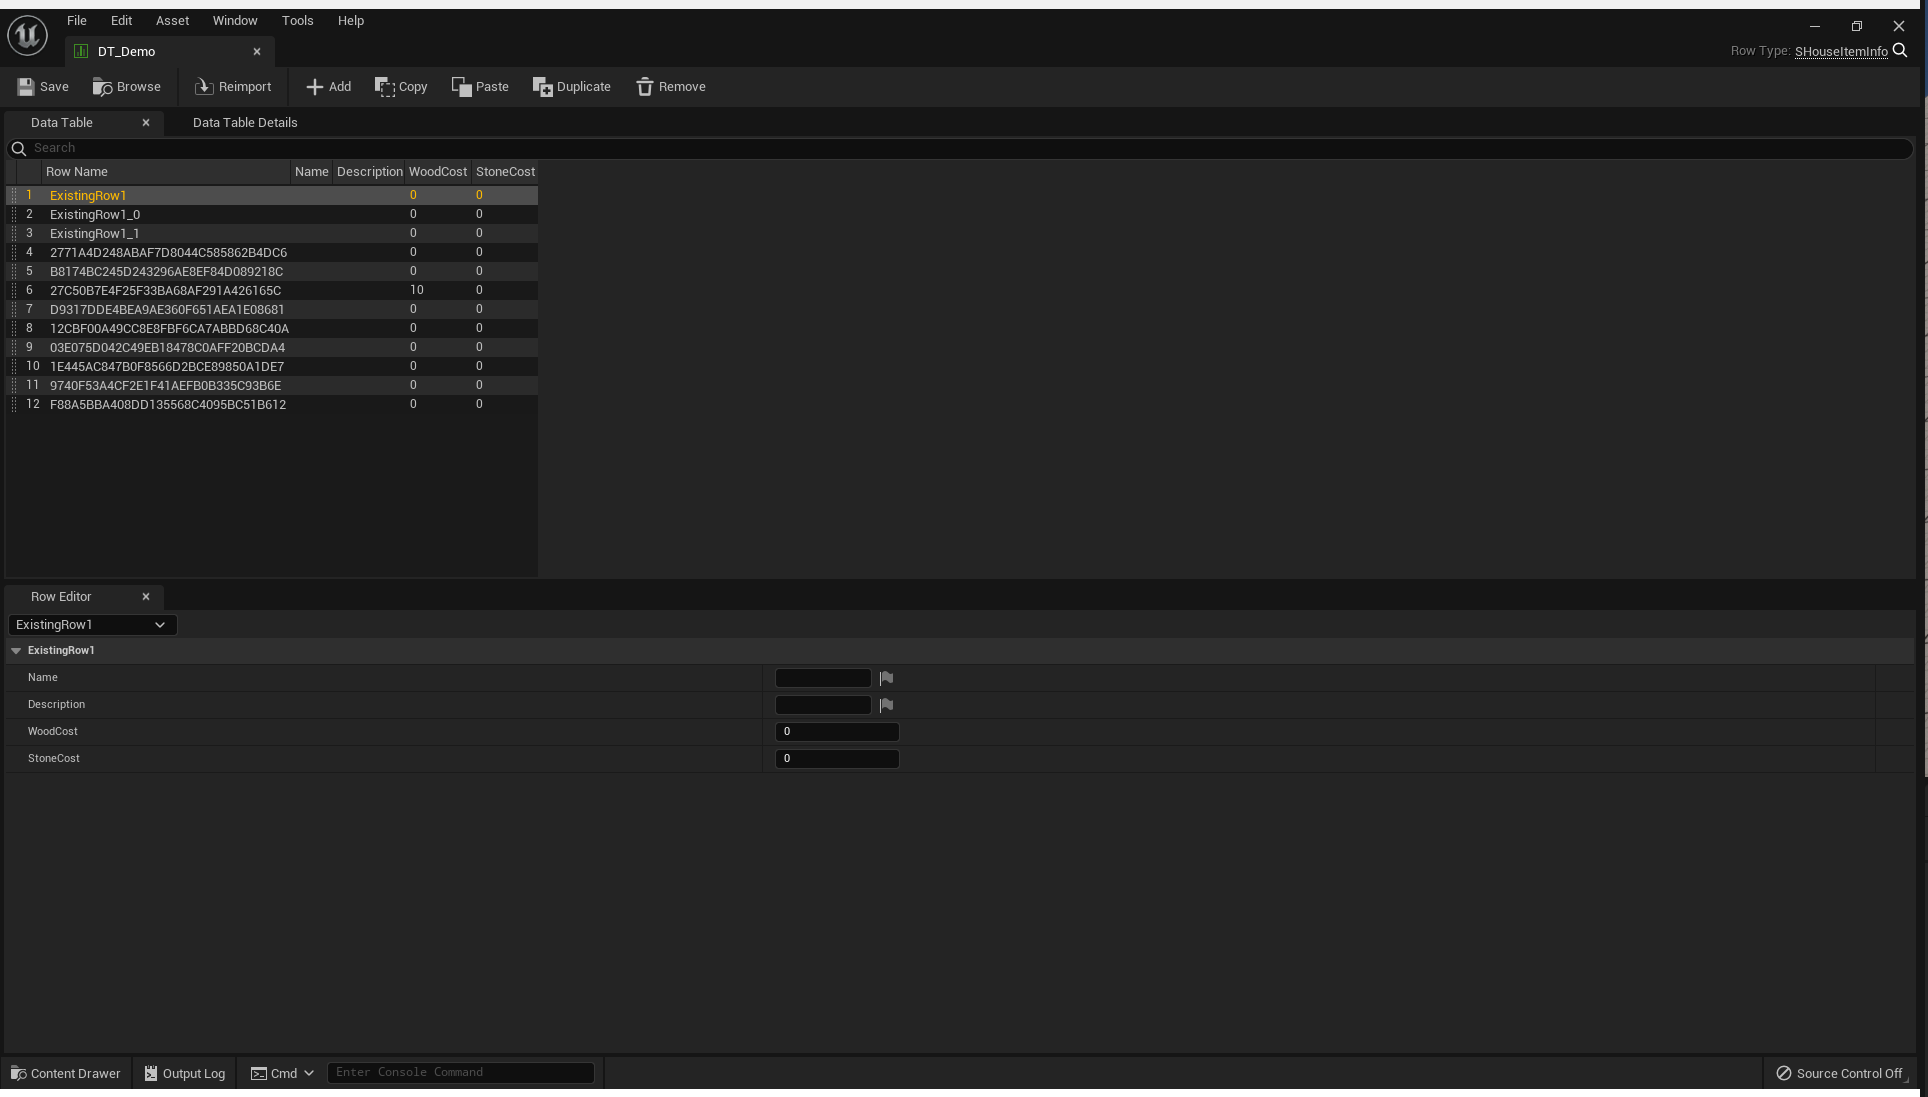
Set the data table and click Initialize Data. New empty rows will be created with RowNames matching the item IDs, while existing rows will remain unchanged.
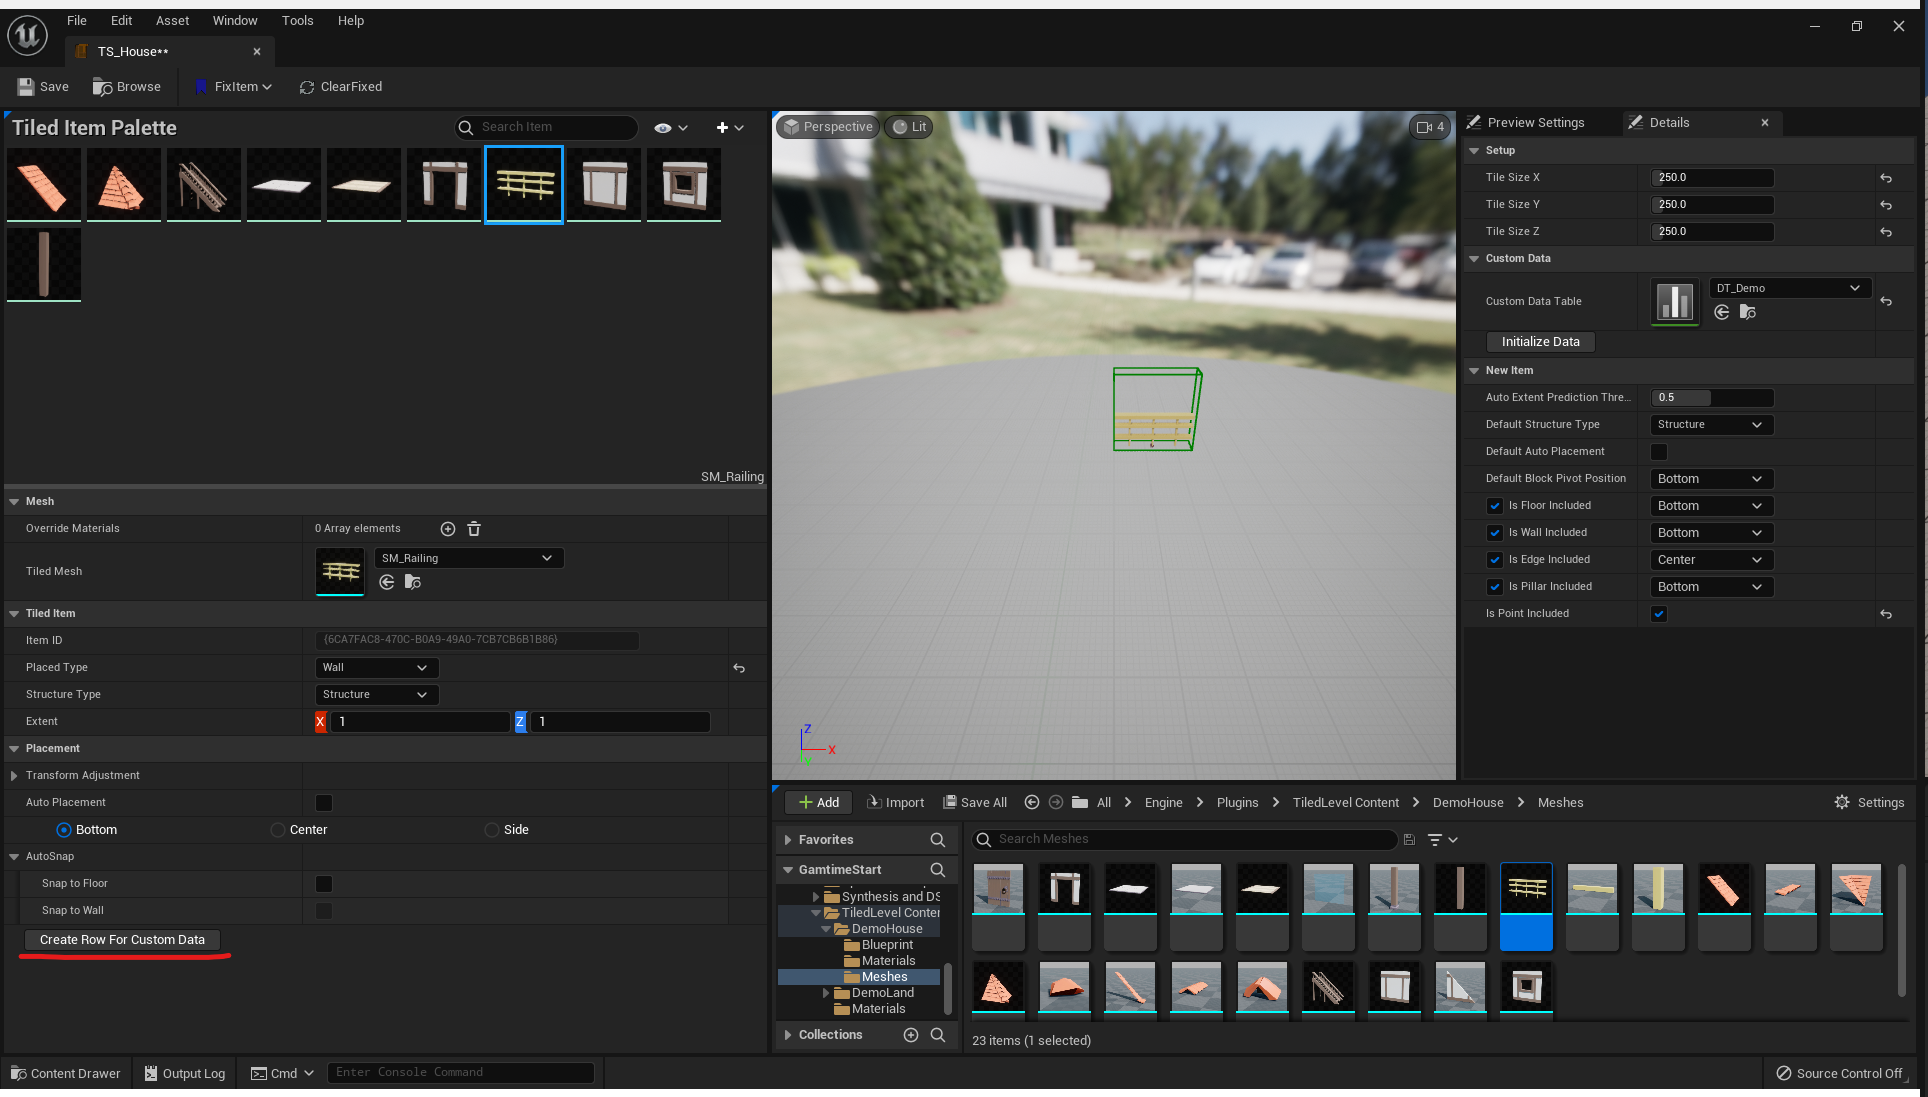
If you add a new item to the item set after setting up this linkage, click Create Row For Custom Data and a new row will be generated in your data table.
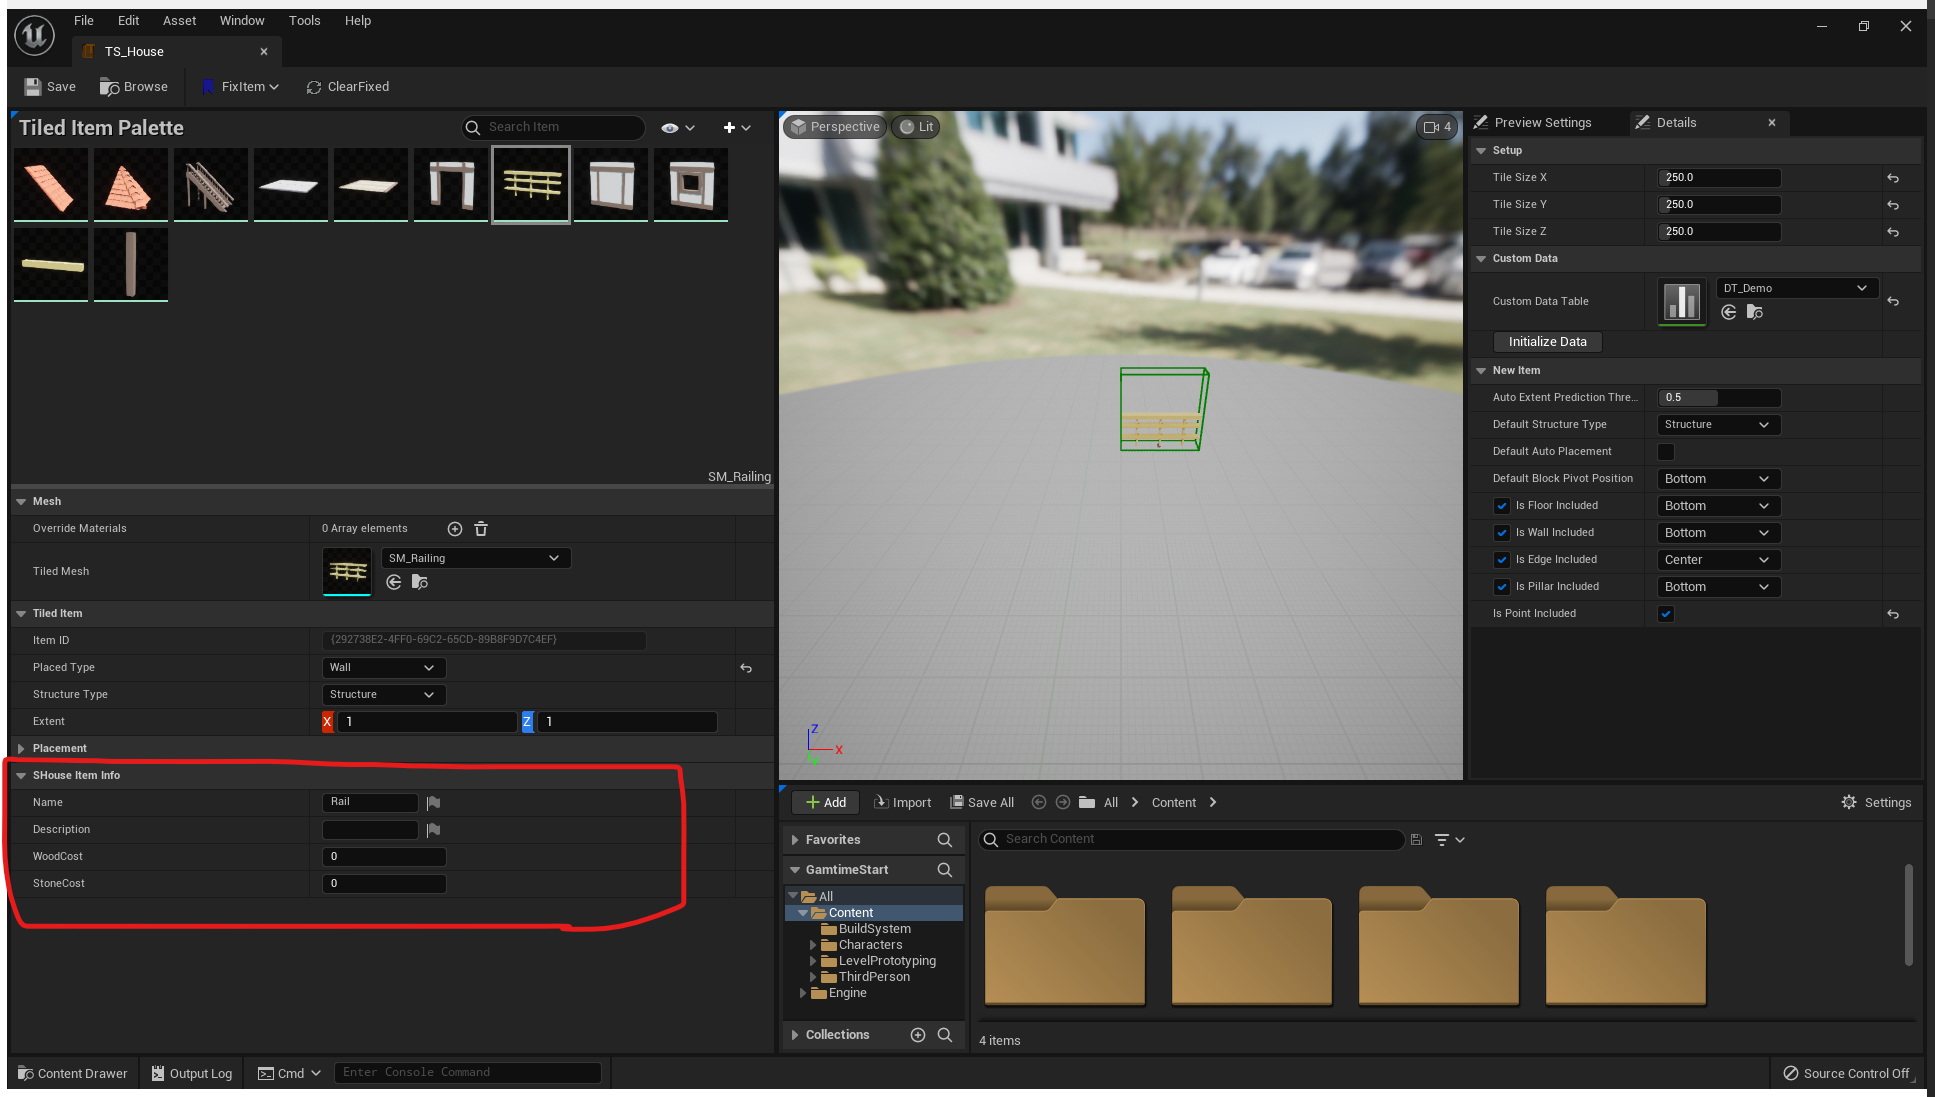
- Edit inside tiled item set
Once the linkage is set up properly, you can edit the data directly below the detail panel for each item. This makes it much more intuitive to add descriptions for these items.
- Query it for what you want
Now you can easily query the data for your needs. For example, check whether a resource cost is affordable.
Editing data in the data table editor and tiled item set editor at the same time may occasionally crash the editor. Once the linkage is created, you should only work in the tiled item set editor.
AI Navigation
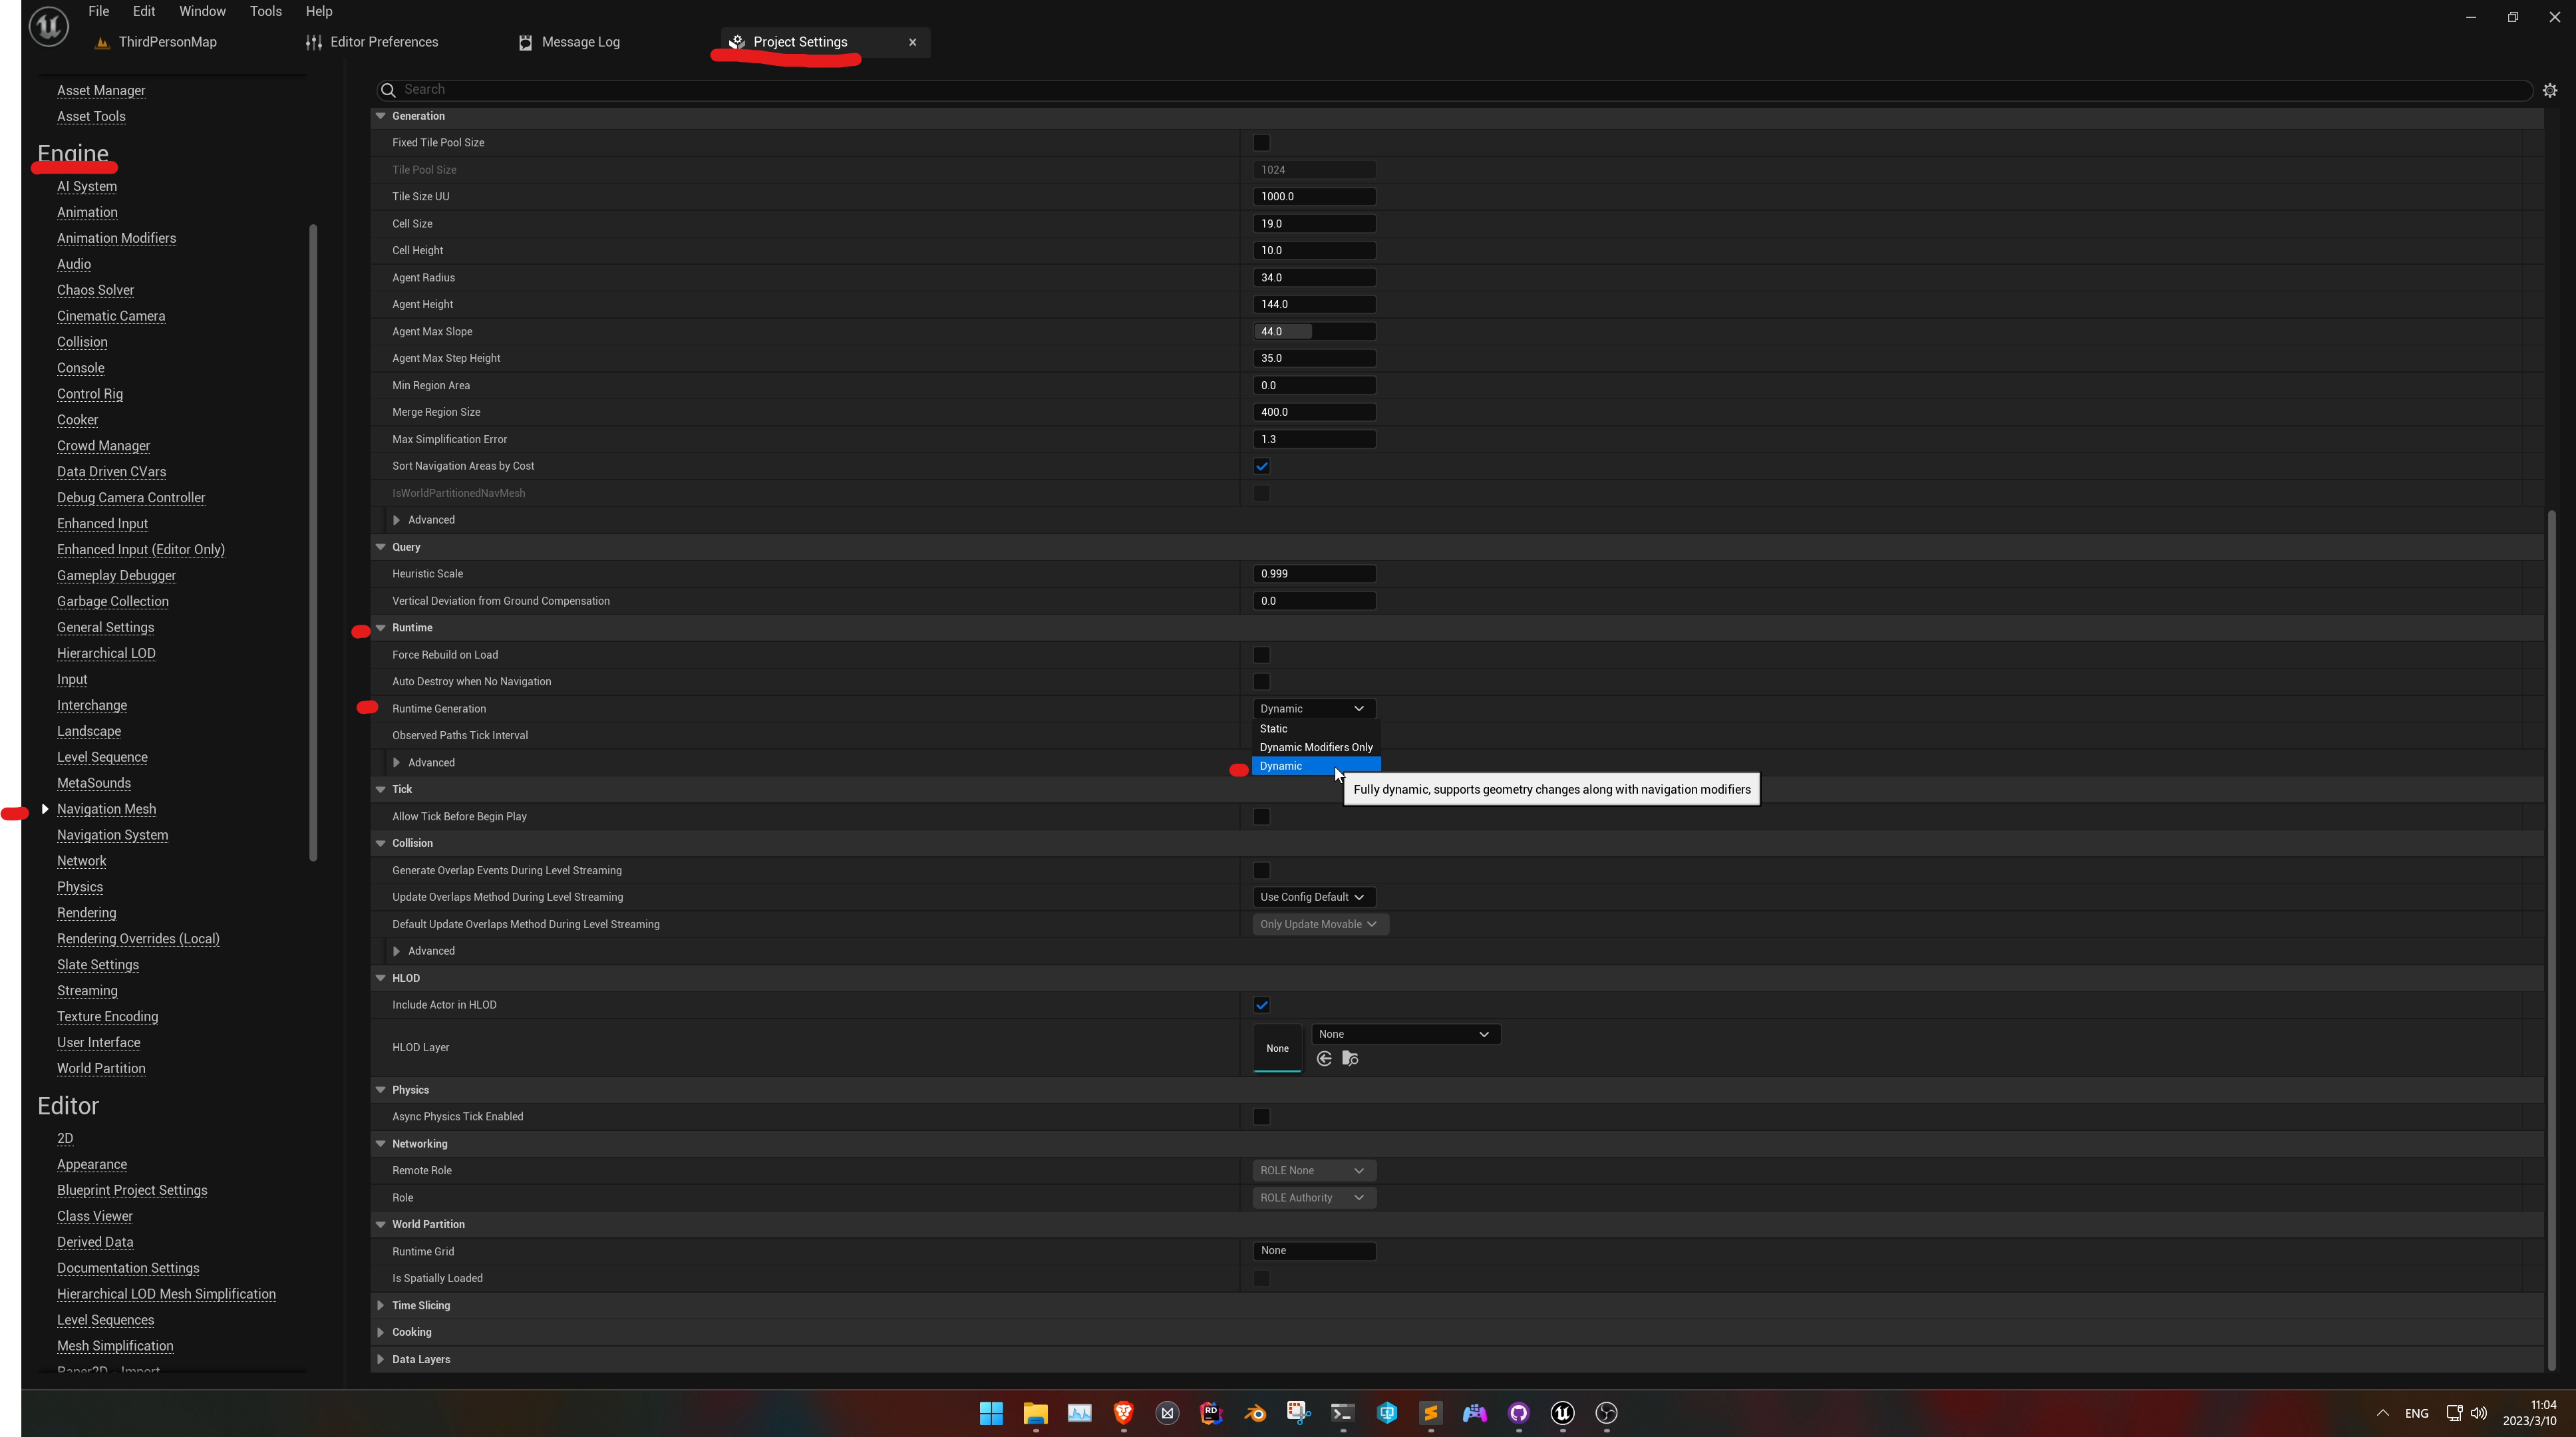
If you want your AI agents to update their navigation paths in response to building or removing placements at runtime, like this:
Simply set the runtime generation for the nav mesh to dynamic. (Project Settings -> Navigation Mesh -> Runtime -> Dynamic)
Save and Load
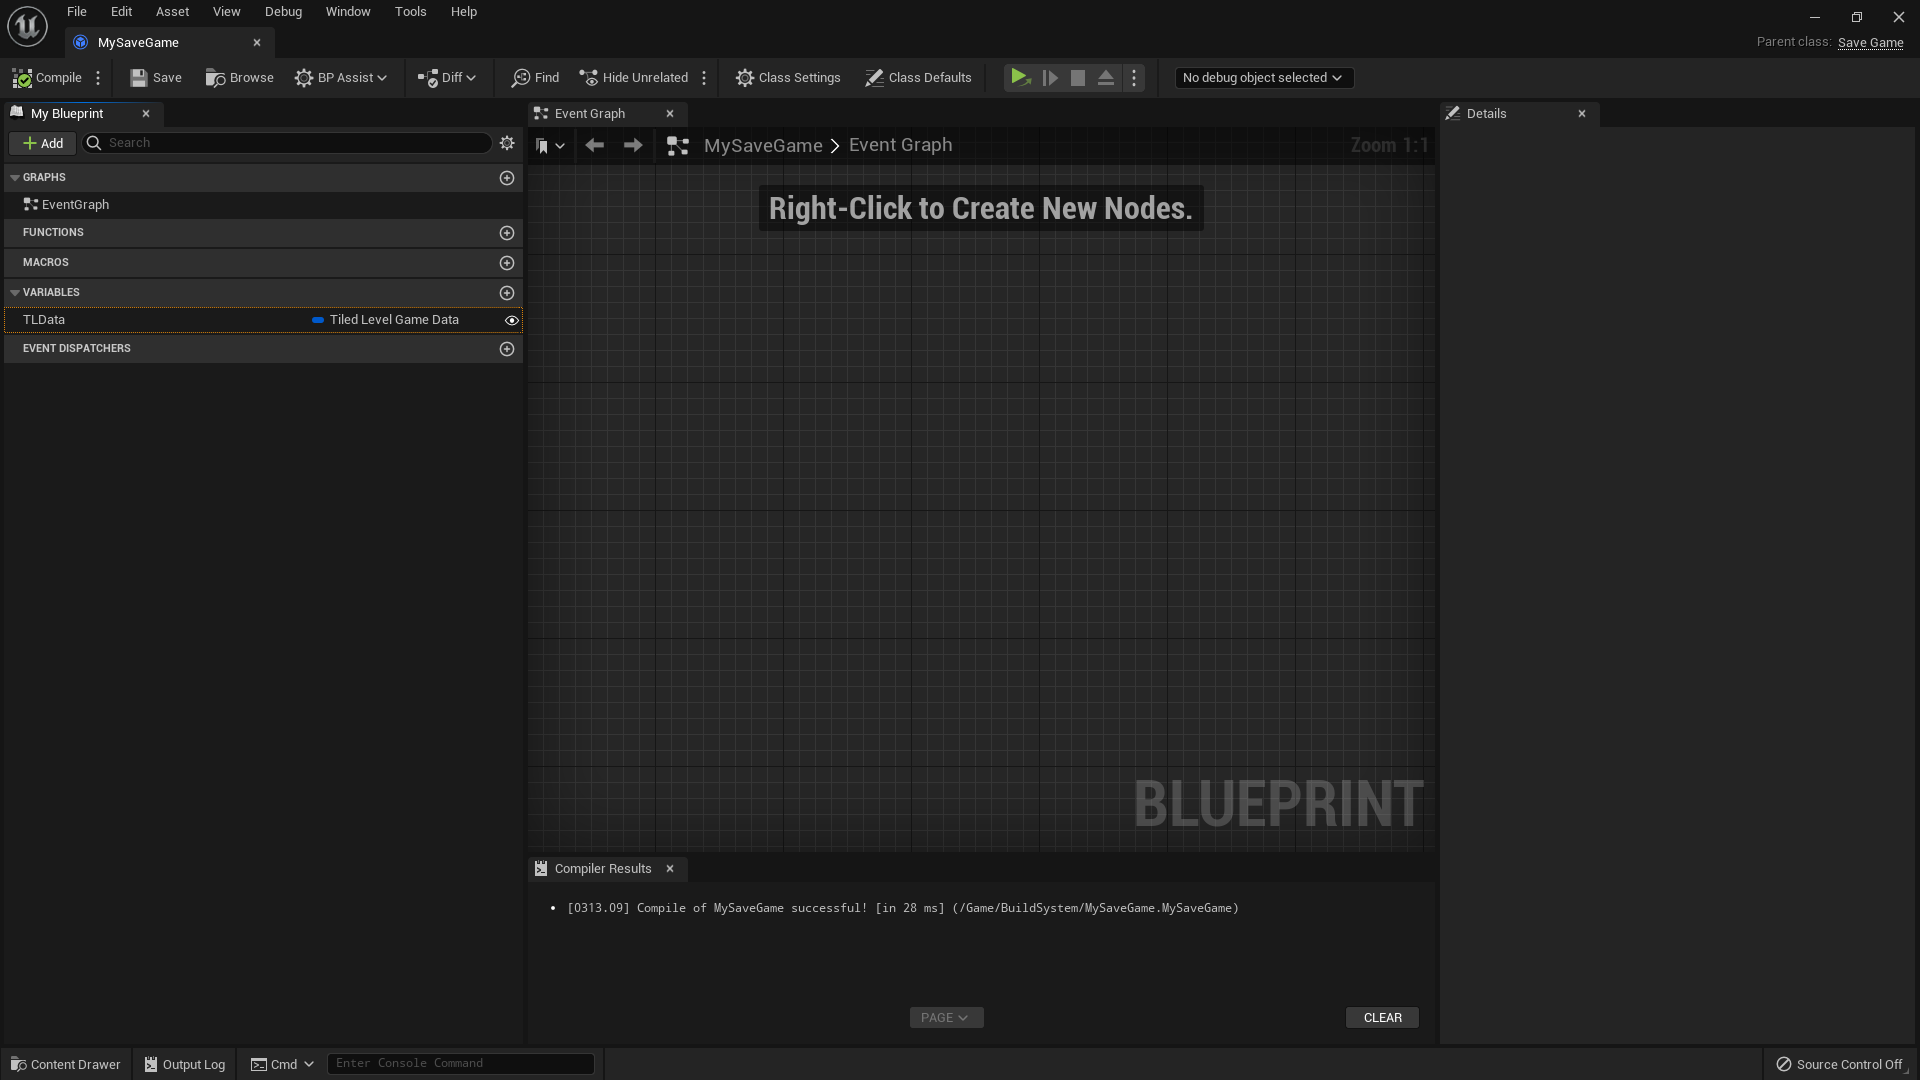
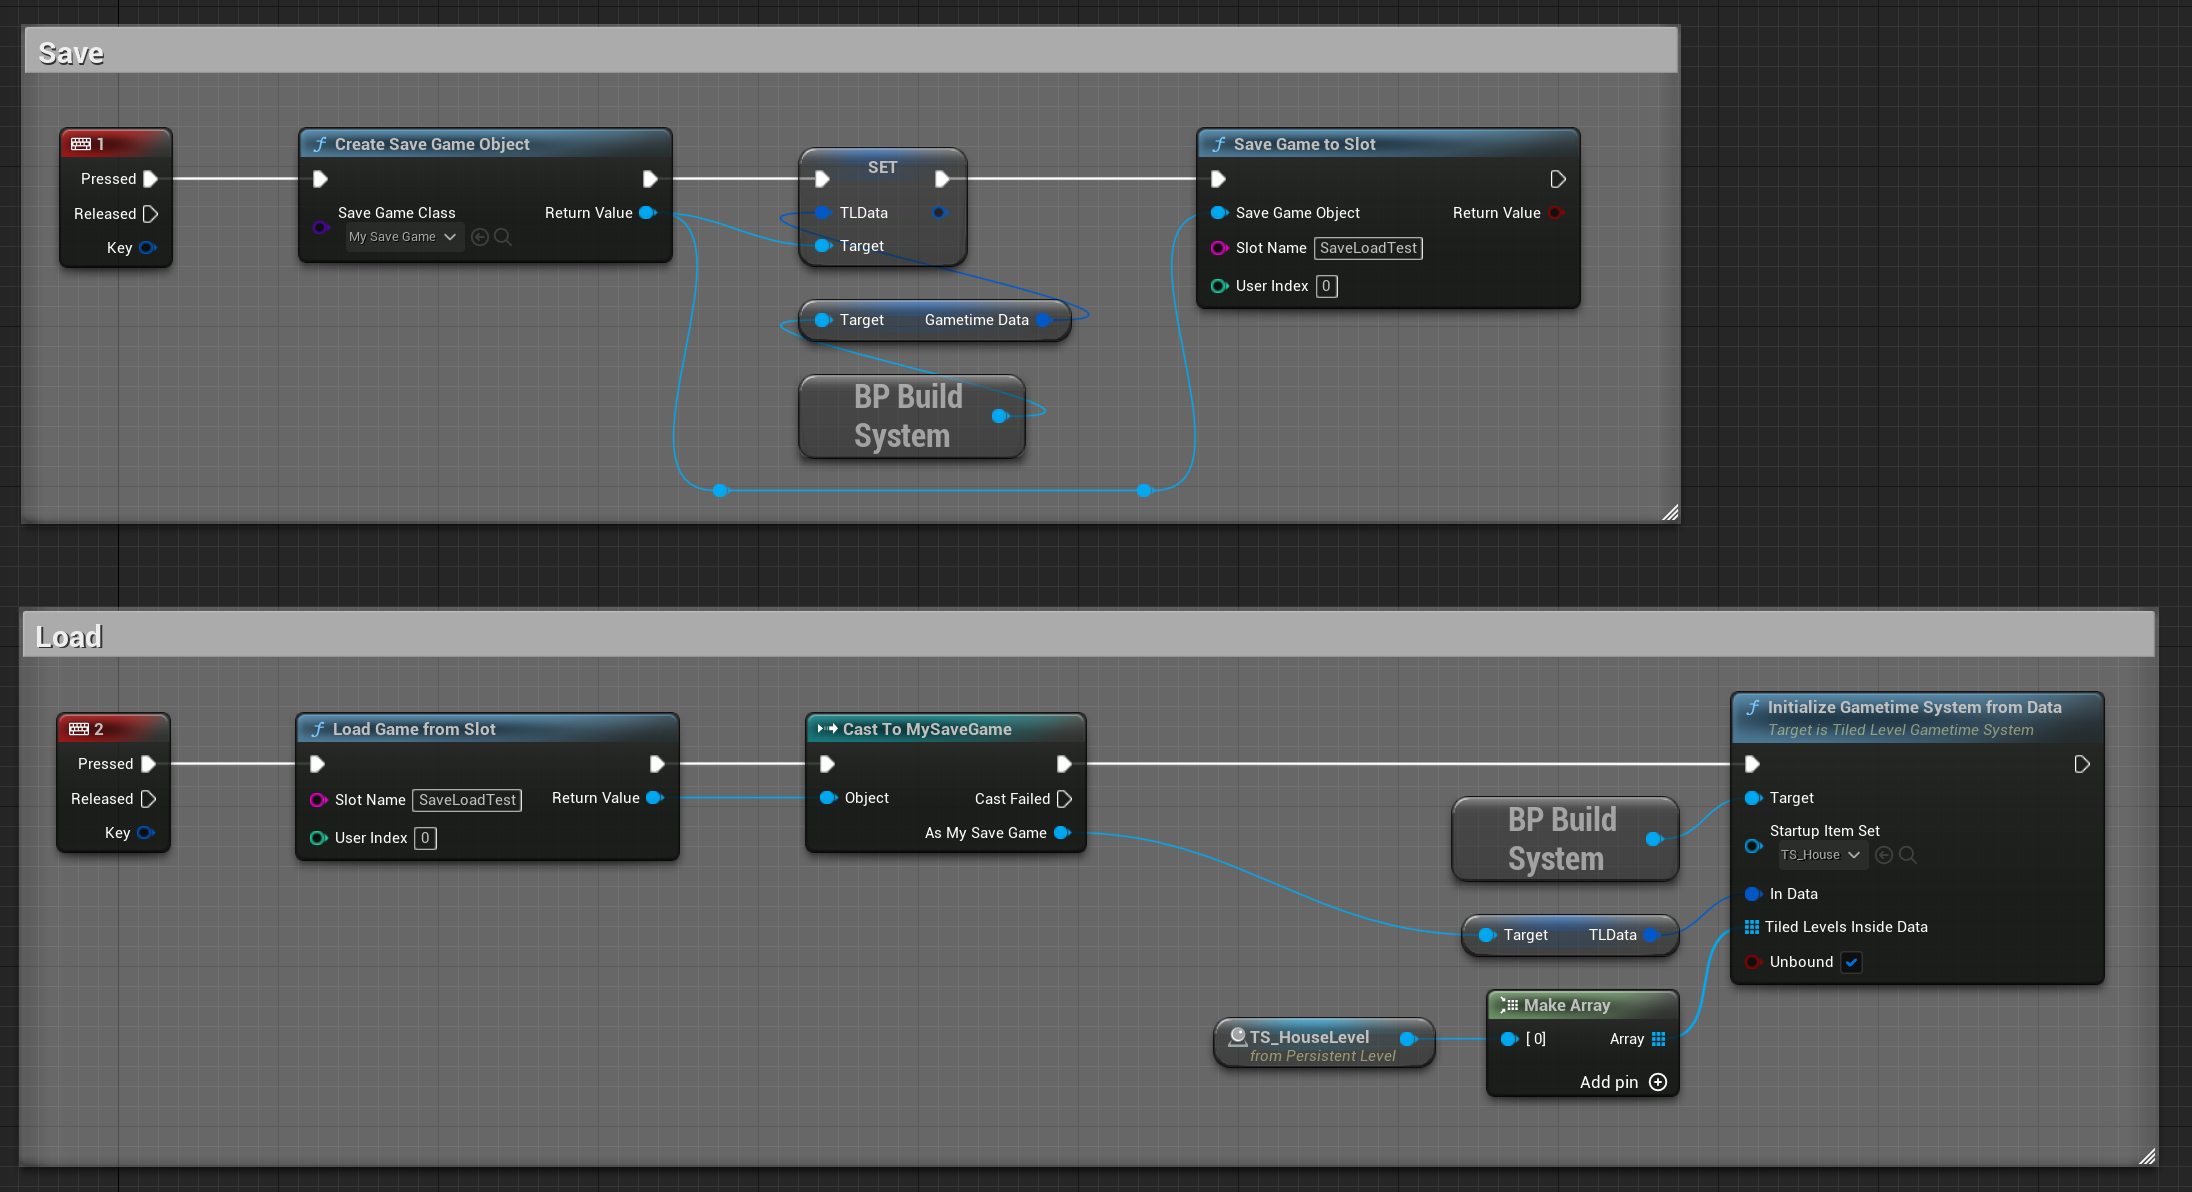
All placement information is stored in Gametime Data (type: Tiled Level Game Data) within your TiledLevelGametimeSystem. To save it, create a save game object and add a new variable of type Tiled Level Game Data. To load existing saved data, retrieve the data from your save game and call InitializeGametimeSystemFromData.
Check out Saving and Loading Your Game if you are not familiar with the process.
Here’s a sample setup:
Asset Manager Setup
To use the Tiled Level Gametime System, you must inform your game instance of its existence. Otherwise, the packaged project will omit this system and all gametime system functions will not work.
In current engine versions, you cannot access this newly created blueprint game instance subsystem unless you load it through the asset manager.
Steps to set up:
- Navigate to Edit -> Project Settings -> Asset Manager
- Add a new Primary Asset Type to Scan
- Set the Asset Base Class to your gametime system
- Restart the Unreal Editor
Once completed, you should be able to access this system anywhere in your project.
