Create auto paint item, define rules, and quick preview how they works.
Overview #
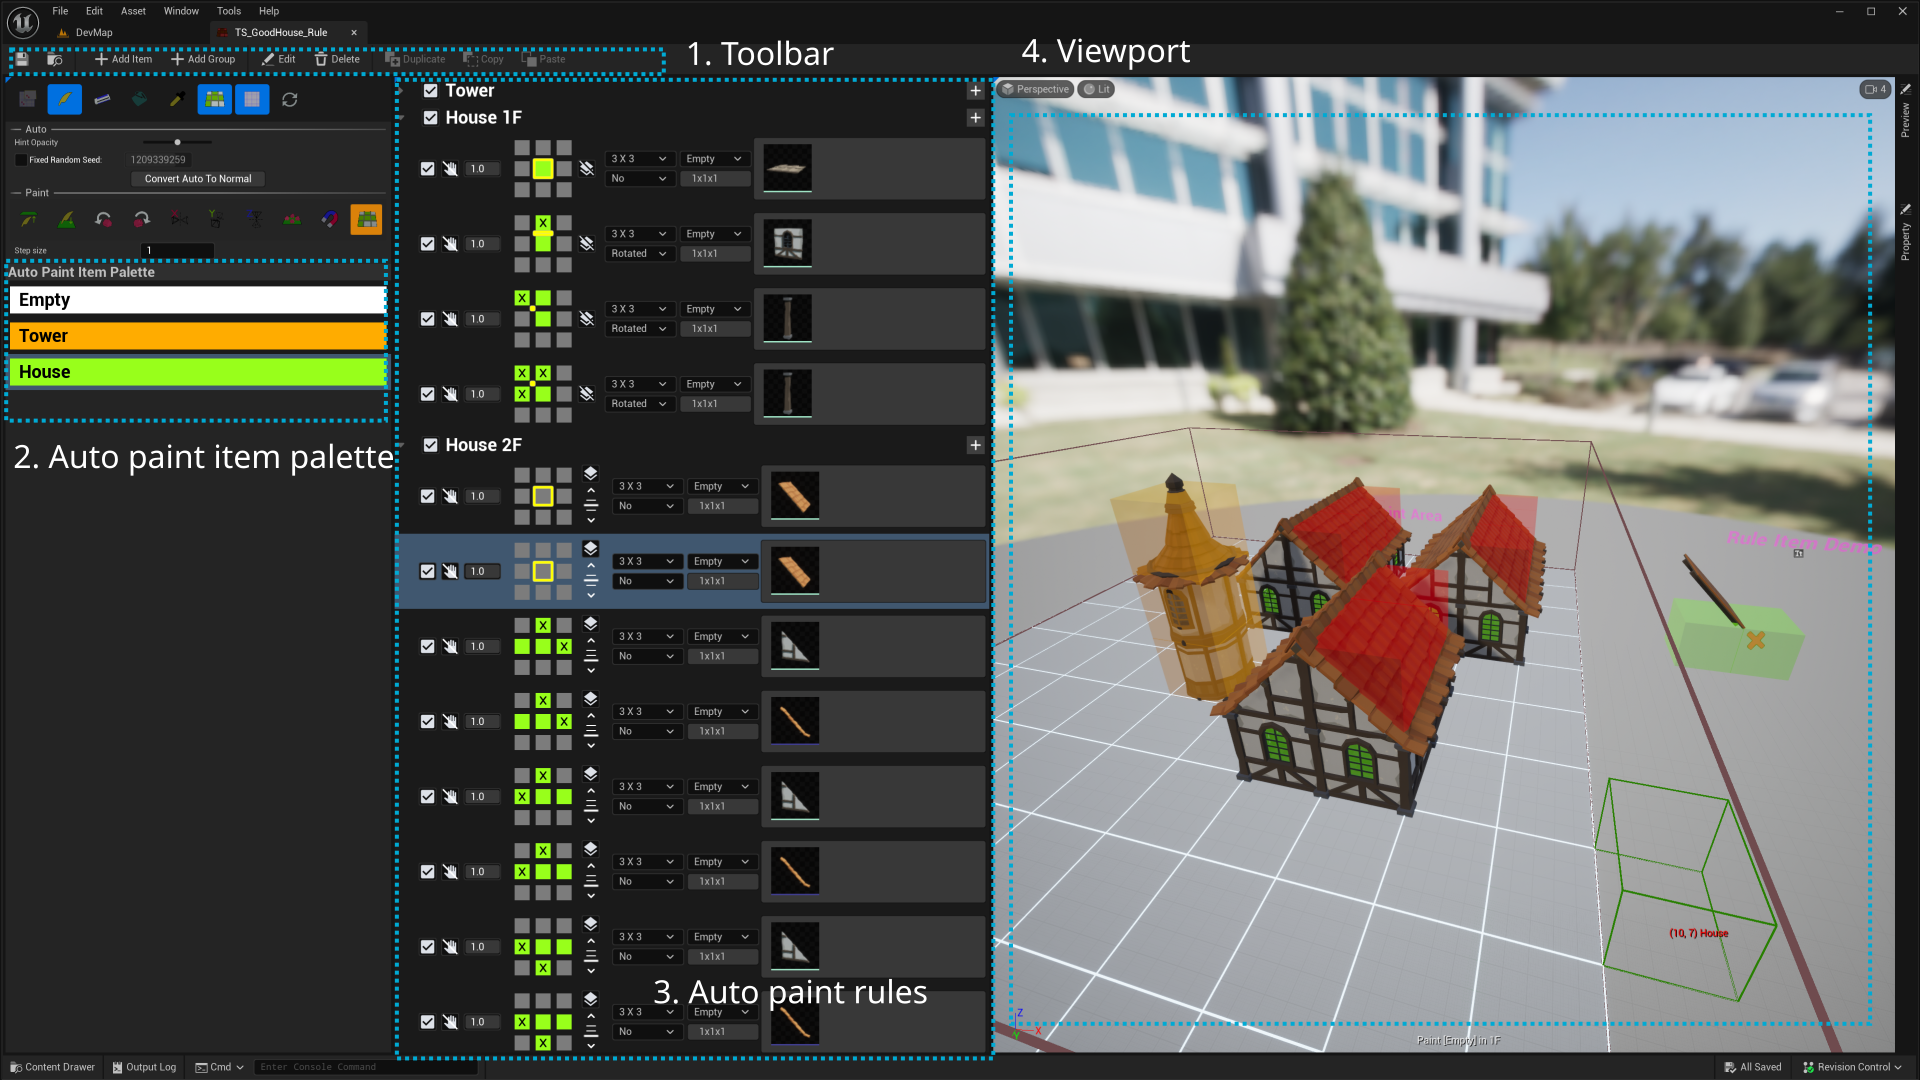
Toolbar #
Add item #
Add new auto paint item.
Add group #
Add new rule group.
Edit / Delete / Copy / Paste #
On selected auto paint item, rule group, or rule.
Auto paint item palette #
Auto-paint item is used for defining the type of each tile position. It enables you to edit your adjacency rules and paint on a level.
Auto paint rules #
Group #
Groups are only used to organize your rules.
Ordering #
The order for each rule matters a lot! Rules are estimated from top to bottom, and when it met a rule with stop on met turn on, it will stop. You can drag and drop group to rule to order them.
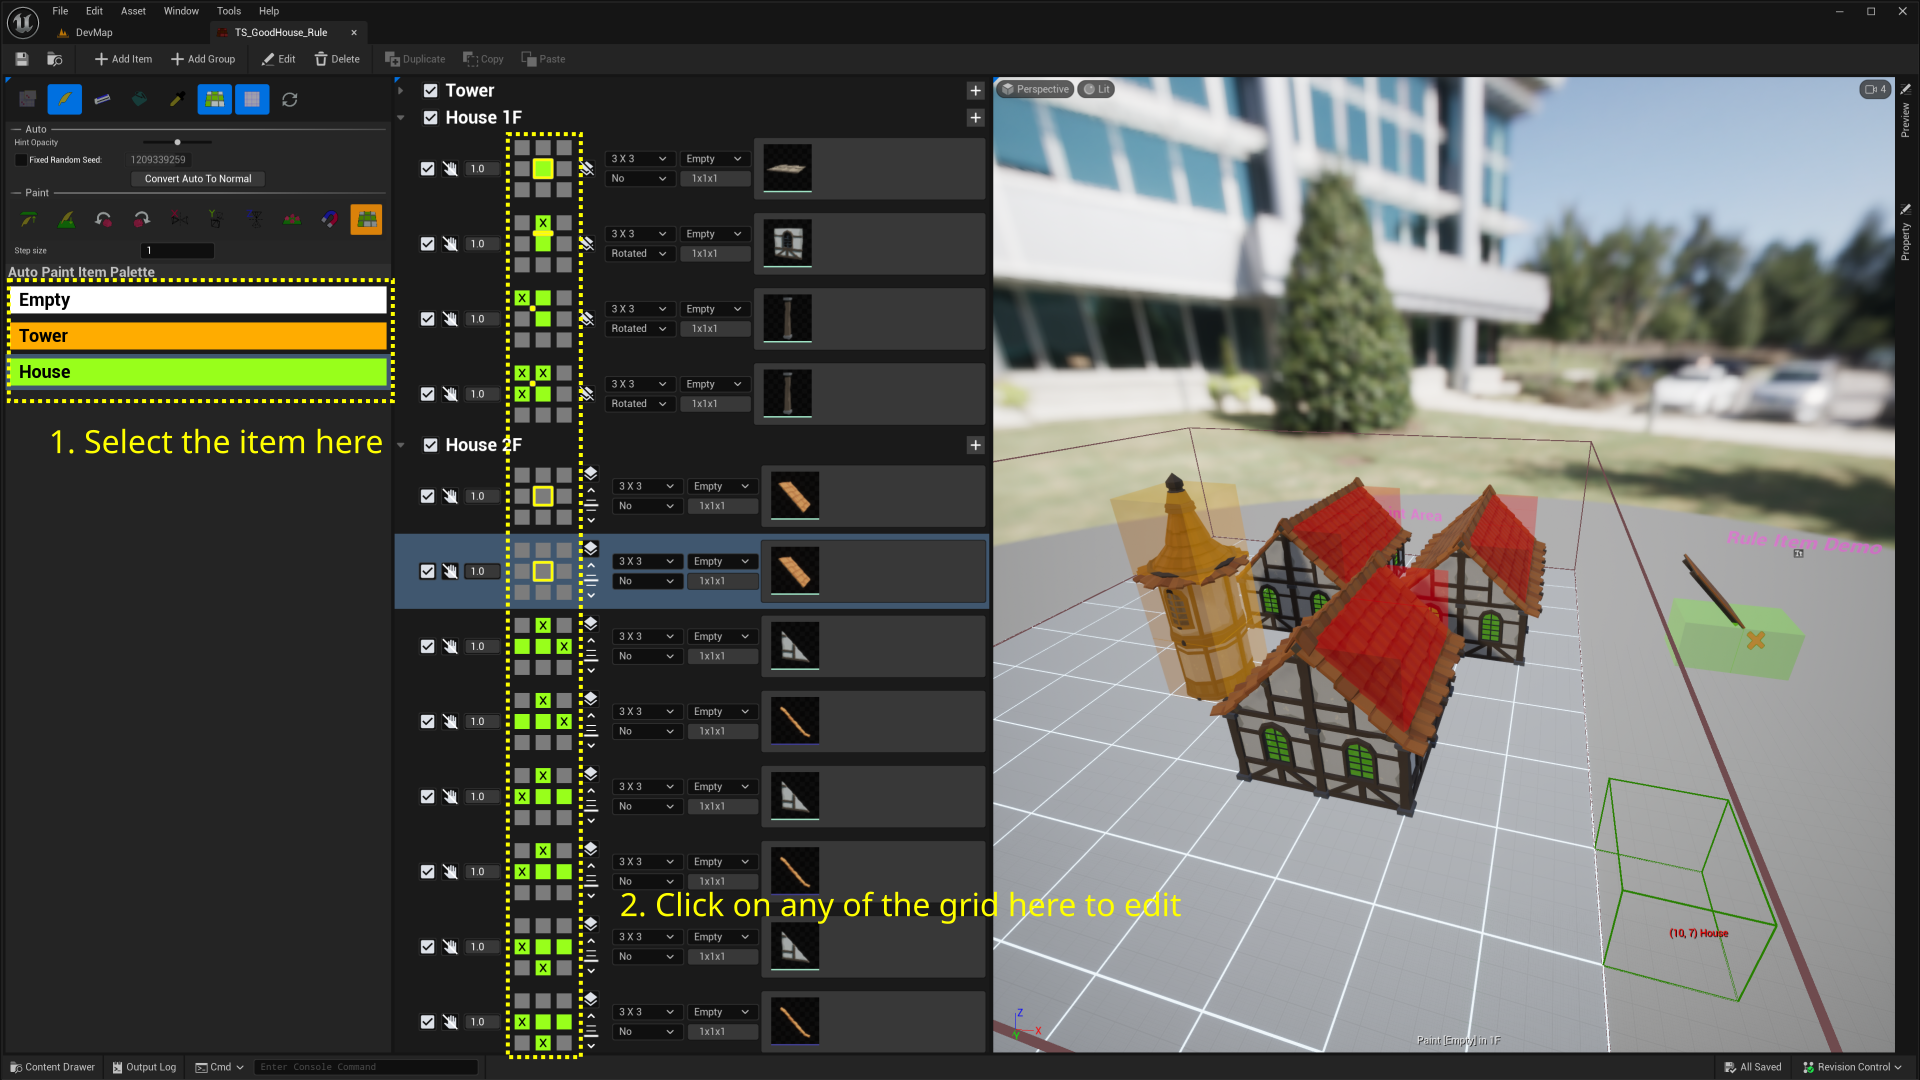
How to edit? #
Select any item on palette then click on the grid area in each rule.
- When select non-empty:
- Left mouse button(LMB): set this position as active item.
- Shift + LMB: set as Not this item.
- Middle mouse button: set as empty.
- When select empty:
- LMB: set as empty.
- Shift + LMB: set as Not empty.
- Not this item: this position must not be painted with this item. It’s acceptable for any other item or empty.
- Not empty: this position must be painted with anything.
- Empty: this position must be empty.
Rule detail #

-
Enabled
Should enable this rule?
-
Stop on met
When this rule is met, should the algorithm check any of the rules below for this specific tile position?
-
Rule apply probability
The probability whether this rule will apply. You can introduce some randomness via it.
-
Adjacency rule
Represent the N x N (x N) tile position around the center point. All point in your tiled level will be assessed through the adjacency patterns define here.
-
Floor switcher for adjacency rule
Whether include Z axis for adjacency rule and a simple widget to switch which floor to edit adjacency rule.
-
Impact size
Define the surrounding size that may affect whether this rule will meet,including 1x1 , 3x3, and 5x5.
-
Out of boundary
Choose what to handle when impact size is out of boundary. This will happen at the edge of your level when impact size is bigger than 1x1.
-
Duplication mode
Duplicate this rule for mirrored case or rotated case?
-
Step size
Change step size to further restrict positions where this rule would apply. By default, the rule checking process will scan all positions in your tiled level. You can set it scan on only every X rows, Y columns, or Z floors.
-
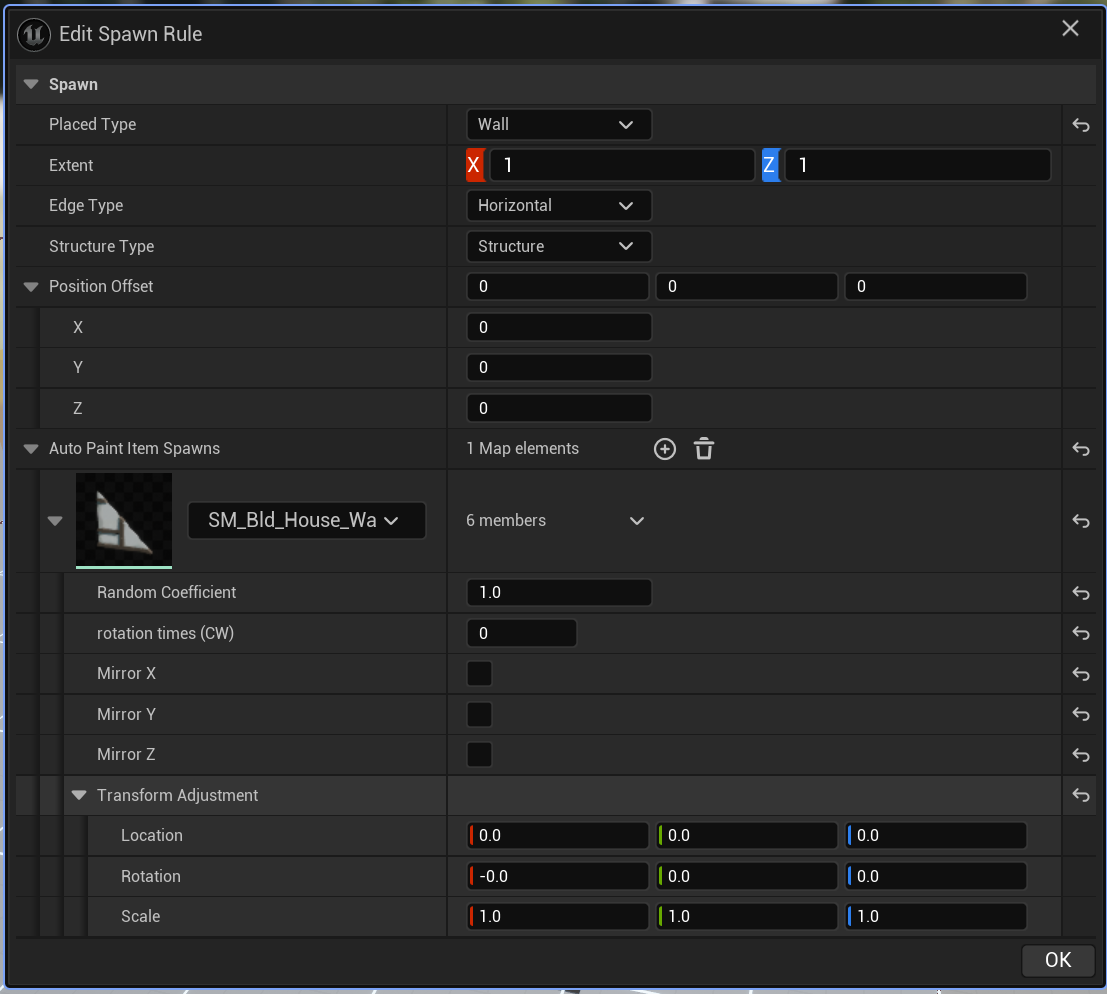
Spawn rule
Click to edit spawn rule.
Spawn rules #
-
Types and extent
Which types and extent should the items you want to spawn here be.
-
Position offset
By default the item will spawn at center. You can offset it by this value and visualize it in adjacency rule.
-
Spawns
Defines what to spawn and further tweaking its transformation. When multiple items are defined, the algorithm will randomly pick one based on the random coefficient.
Test paint area / Active rule demo #
The viewport is separated into two area:
-
Test paint area:
You paint in this area to check how your rules work.
-
Active rule demo:
Display the rule preview for the selected rule to see how adjacency rules work.
If you can’t move floor up and down via Z or C, you need to open the preview scene setting at lease once. (the docked panel at right side)