Game time
Intro
In this quick start, we are going to build a simple resource-based building system from scratch based on UE5.7.1 Which includes these features:
- Toggle the build preview mode
- Define the resoures needed to build and resource gain when detroy something.
- Set conditions to block building or removal.
- Add events after your build / remove.
We’ll create this very simple gameplay.
- Try build wall, but you don’t have enough stone
- Try mine the rock to get stones, but you don’t have the pickaxe
- Get the pickaxe.
- Mine rocks.
- Build the wall.
Video demo for final result
Project setup
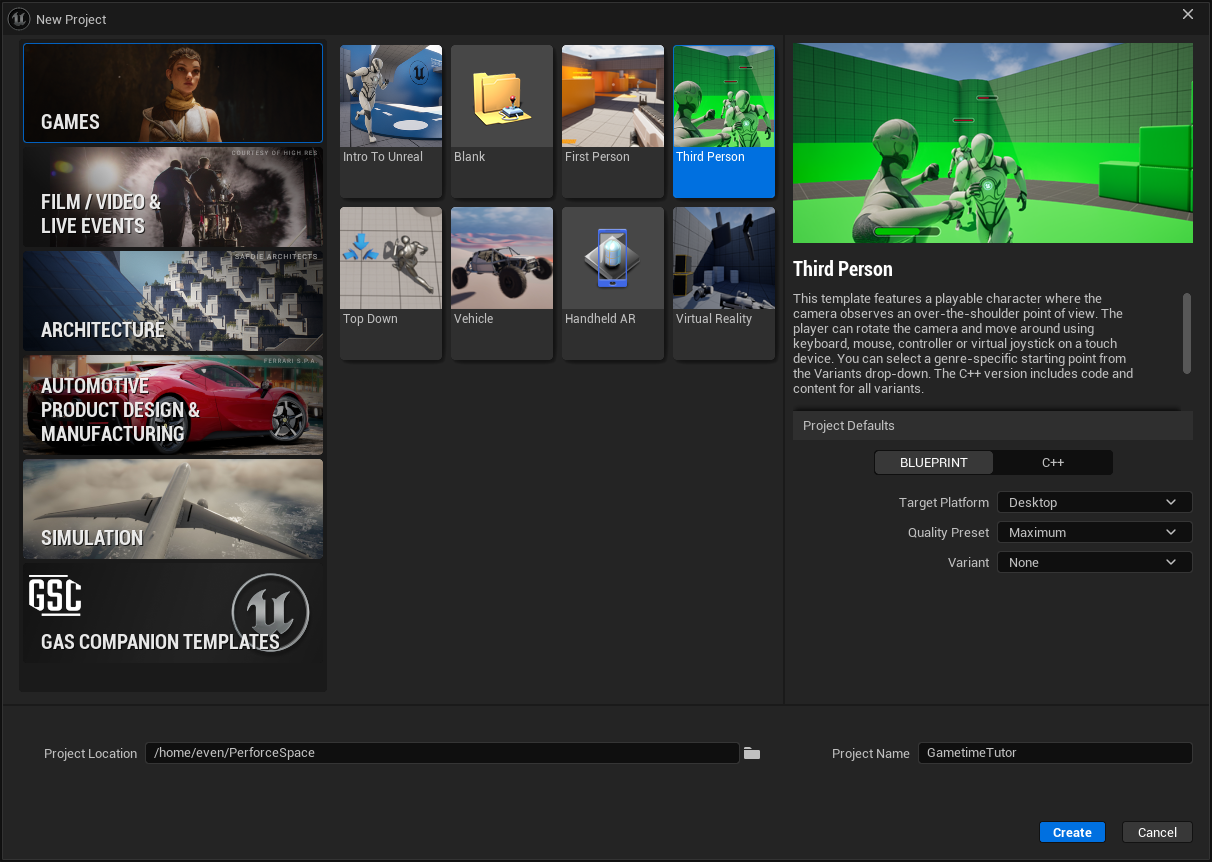
- Create a new project with the Third Person template. (Variant None)
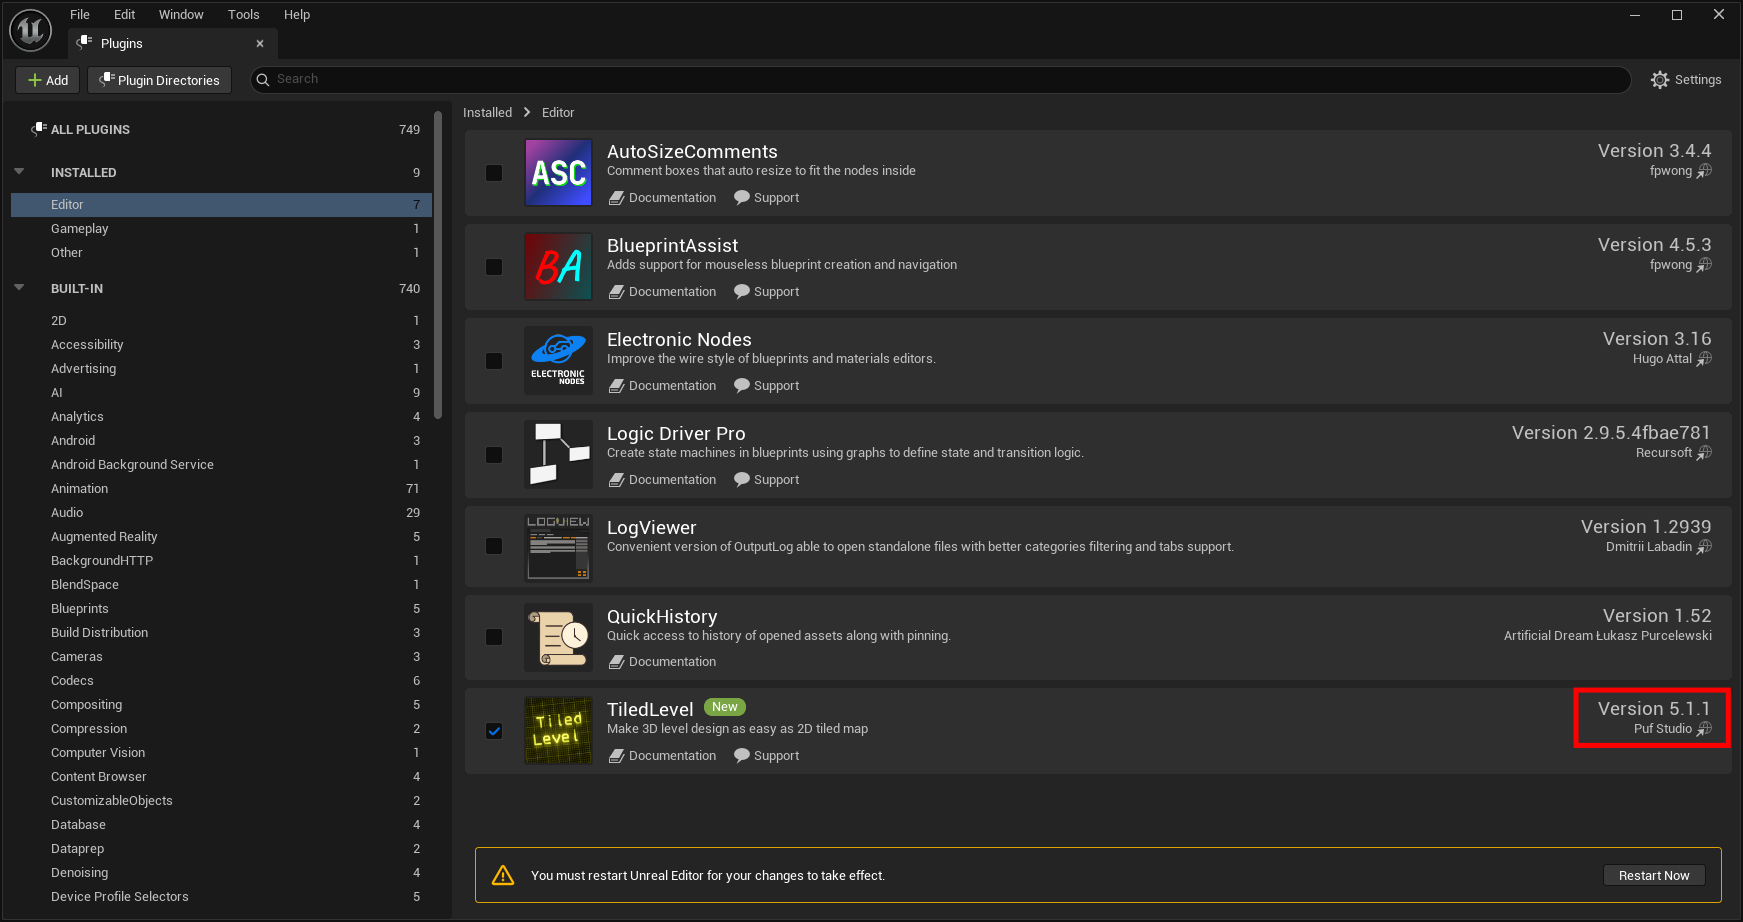
- Activate tiled level plugin, check its version is >= V5.1.1.
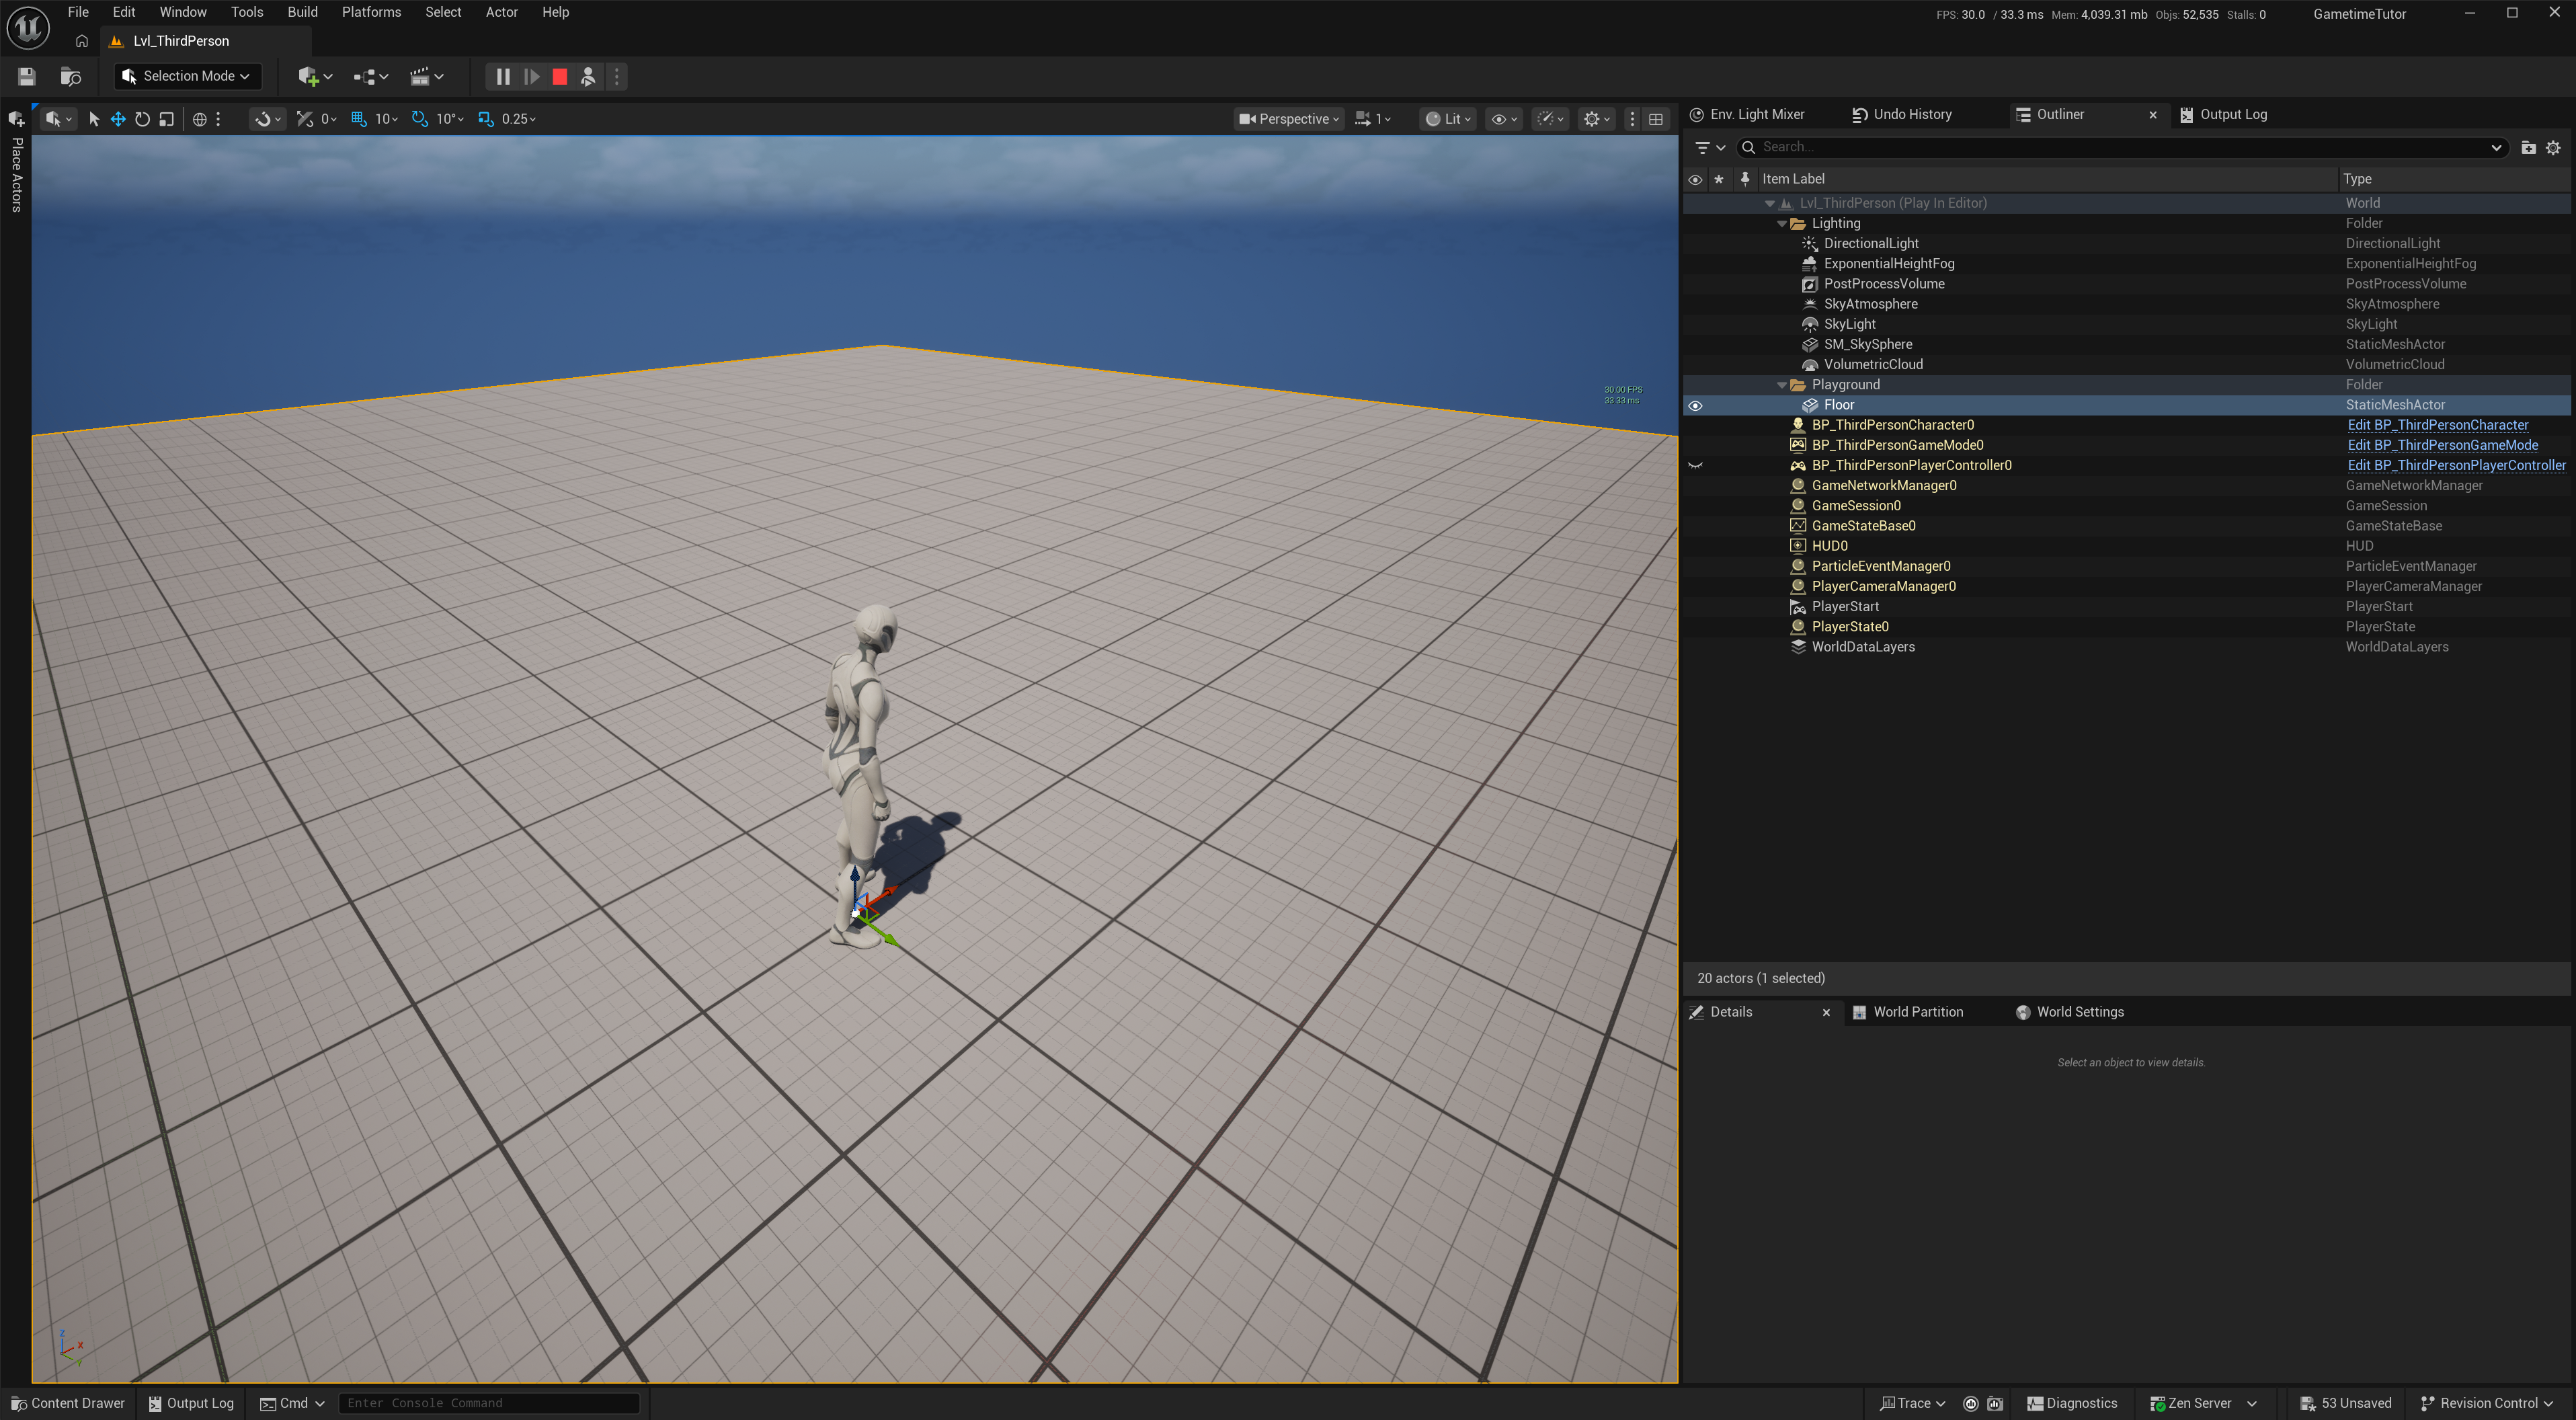
- Clean up the default map by removing all existing meshes except the Floor.
Create tiled level gametime systme
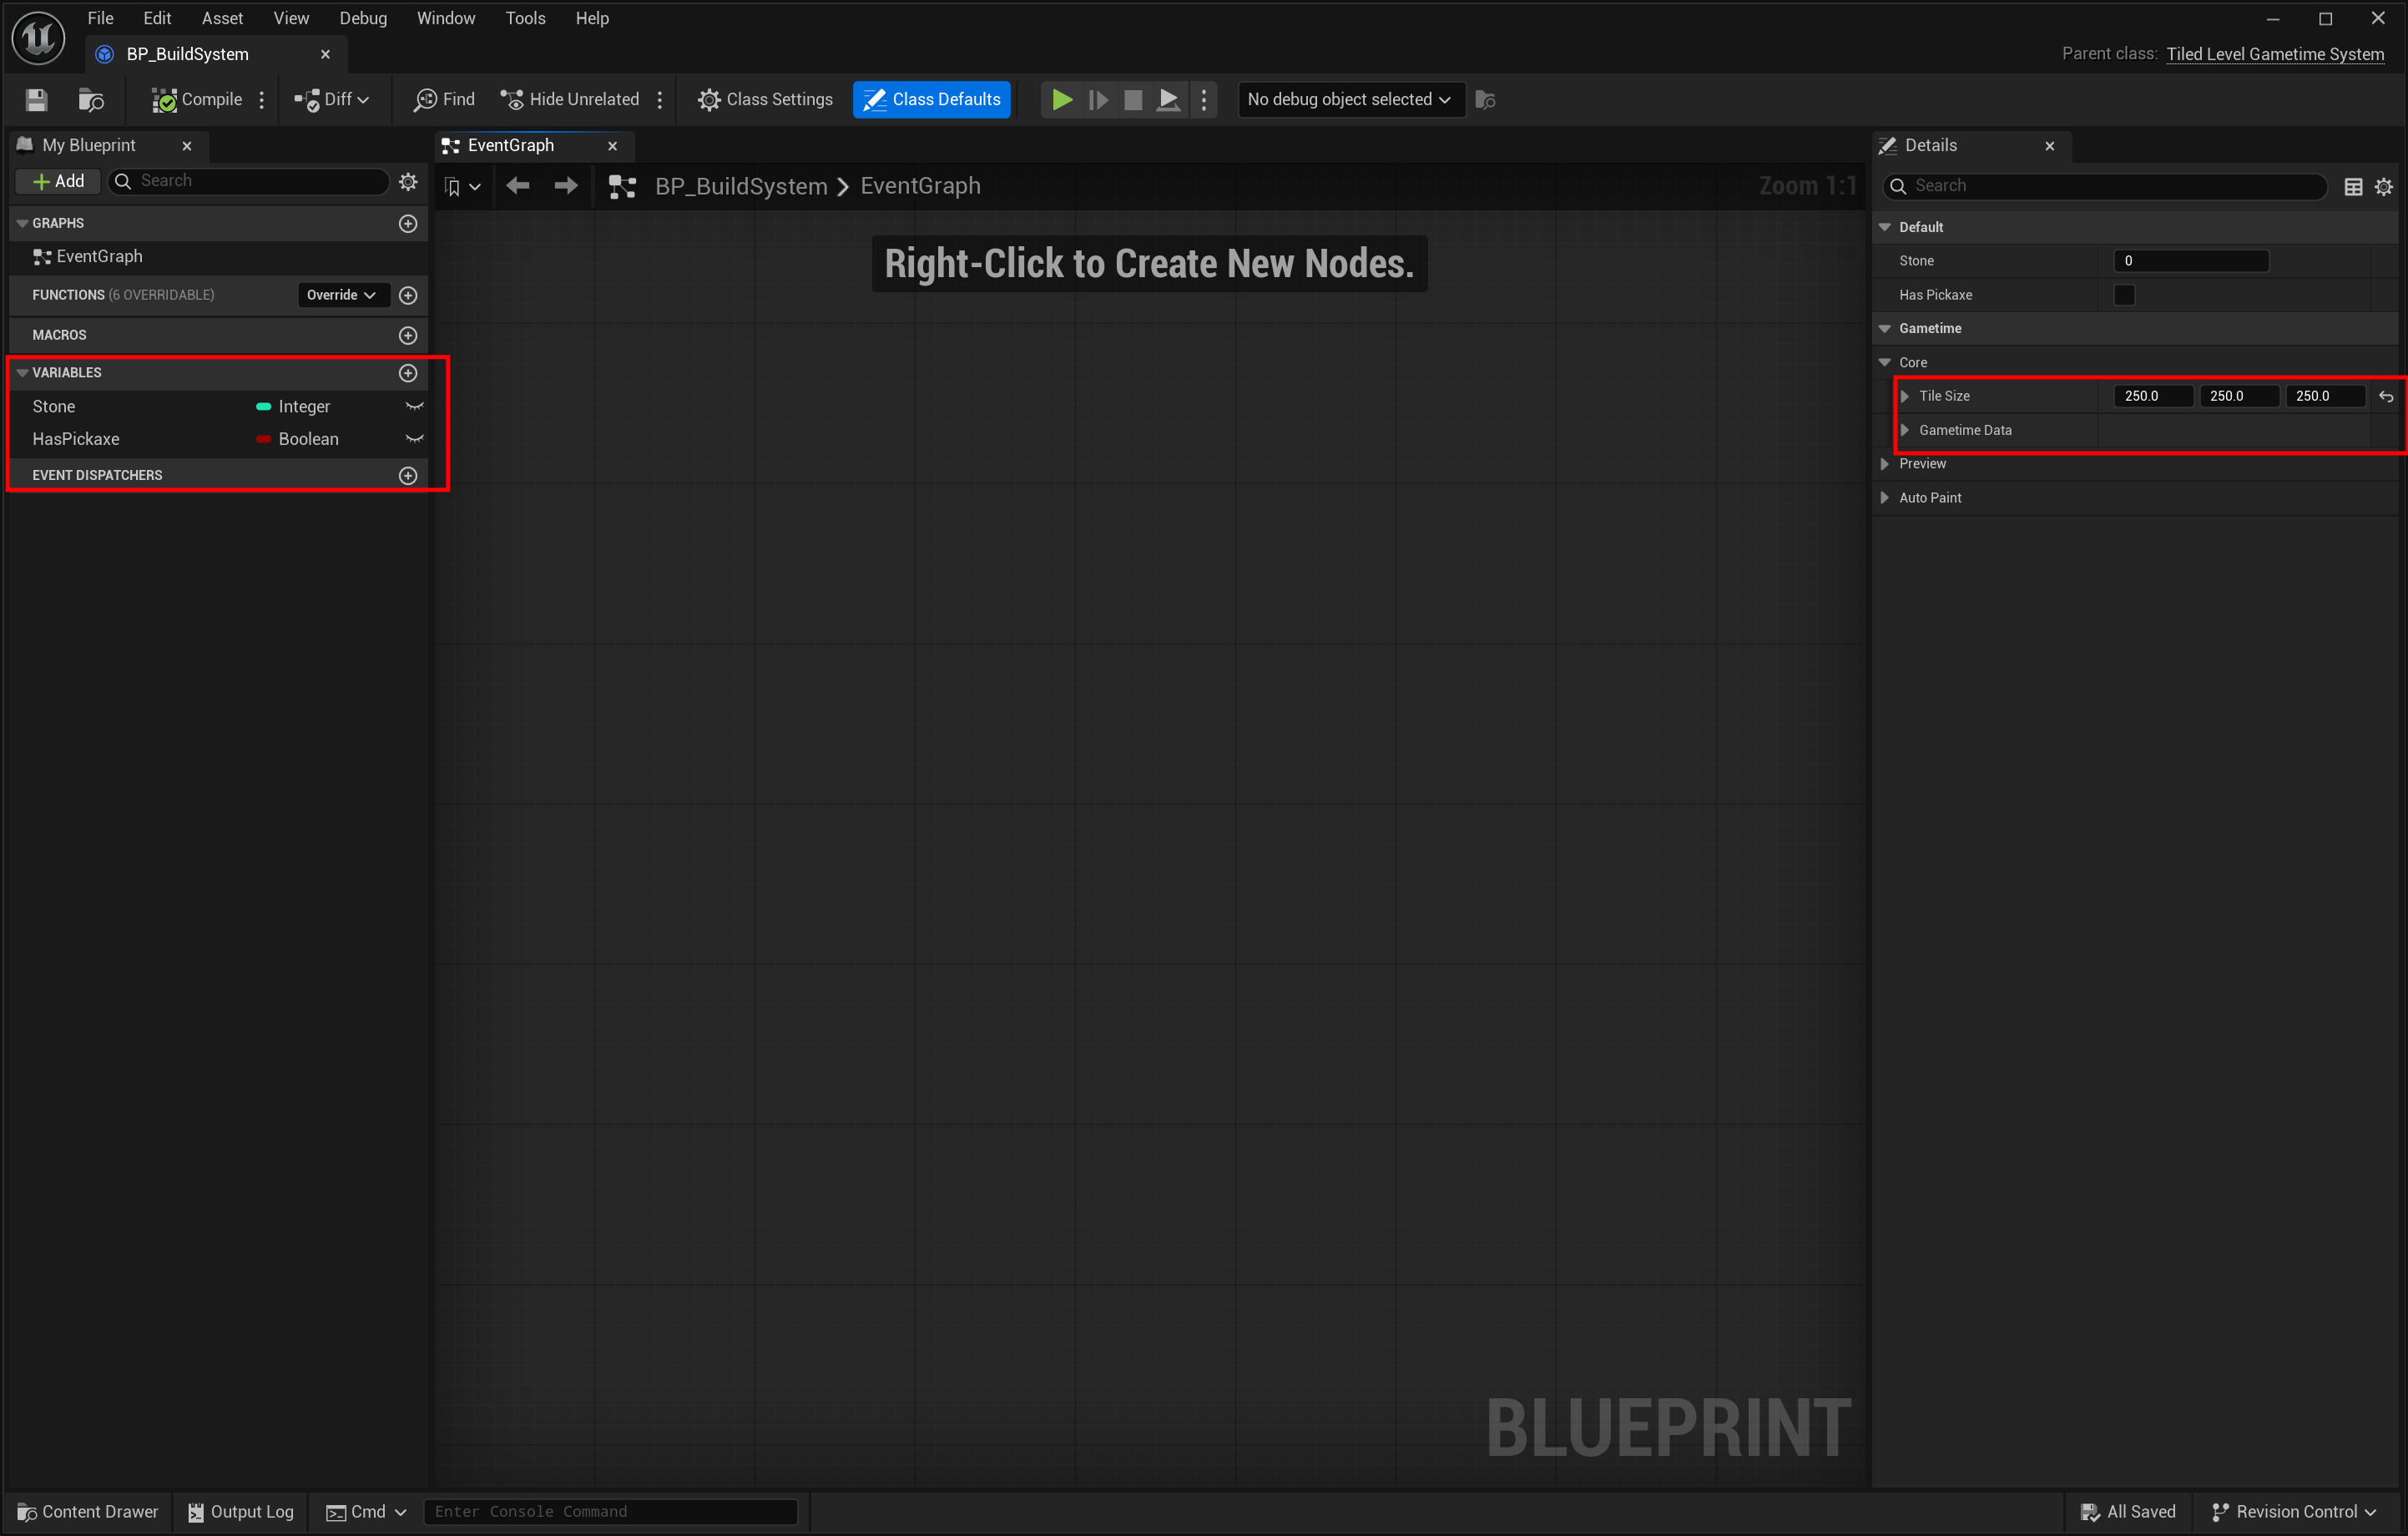
- Create a blueprint inherited from TiledlevelGametimeSystem. It’s a UGameInstanceSubsystem that you can get access to it everywhere with life span across the whole gameplay. Check out the Programming Subsystems if you are not familiar with. Rename the blueprint as BP_BuildSystem.

- Inside class default, set tile size as [250, 250, 250], and create new integer variable Stone as the current resources and a bool variable HasPickaxe.
 That’s it for now. Leave the leave the logic later after setup Item Set and its associated custom data.
Load your build system in asset manager
You must this register custom gameinstance subsystem to asset manager. Otherwise, the whole engine may not find.
- In Edit->Project Settings->Asset Manager, add a new Primary Asset Types to Scan.
- Set the Asset Base Class to your build system, and set the type as you like. (It doesn’t matter.)
- Restart unreal editor.

Now, you should be able to assess the this system anywhere.
create item set
- Create a new item set called TS_Tut, set tile size to [250, 250, 250], and add a rock and stone wall mesh. (from your own asset or my sample asset here) (The tile size MUST be exactly the same as you defined in your GametimeSystem!)

- Set gameplay tag for rock and wall for the ease of query later. All the gameplay tag for tiled item must start with
TiledItem.TiledItem.Resource.Stonefor the Rock mesh.TiledItem.Building.Wallfor the Wall mesh

Create custom data and link with item set
-
Create a Structure called STutResourceInfo. (Right-Click -> Blueprint->Structure)
-
Create 2 variables: StoneGain (integer), and StoneCost (integer).


-
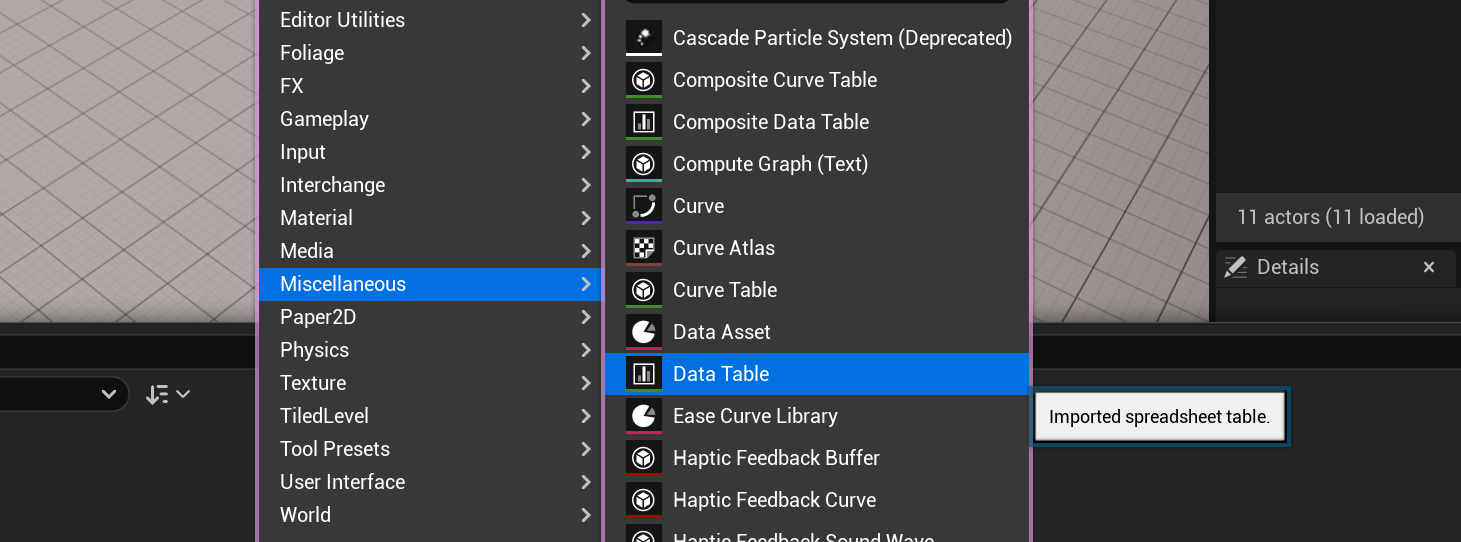
Create a Data Table (Miscellaneous->Data Table) called DT_TutResourceInfo with its row structure as STutResourceInfo. There is no need to edit any content for this data table, just close it.

-
Sync item set and data table: Open TS_Tut, set the custom data table to DT_TutResourceInfo, click Initialize Data.

Now, the linkage between the TS_Tut and DT_TutResourceInfo is established with ItemID as the row name. You can just fill the custom info inside the item set and the data will be stored in the data table.


With these setup, you can just query the row data by the ItemID everywhere you want.
After filling the custom info for each item, the setup at this stage is completed.
Finish your gametime system blueprint
With custom data properly setup, we can continue the rest logic in BP_BuildSystem.
Override two functions: CanRemoveItem and CanBuildItem.

-
For CanBuildItem create the logic to check whether current resources is enough to build that particular item.

-
Assign a custom event to OnItemBuilt to add a simple logic to subtract resource cost for the newly built item. (After begin system)

-
For Can remove Item, create a logic that the item you try to remove contains the correct tag and yous player have pickaxe.

-
Assign another custom event to OnItemRemoved to get stone after you break the rock. (After begin system)
Bind control
Open BP_ThirdPersonCharacter (ThirdPerson/Blueprints) and create the following logic.
-
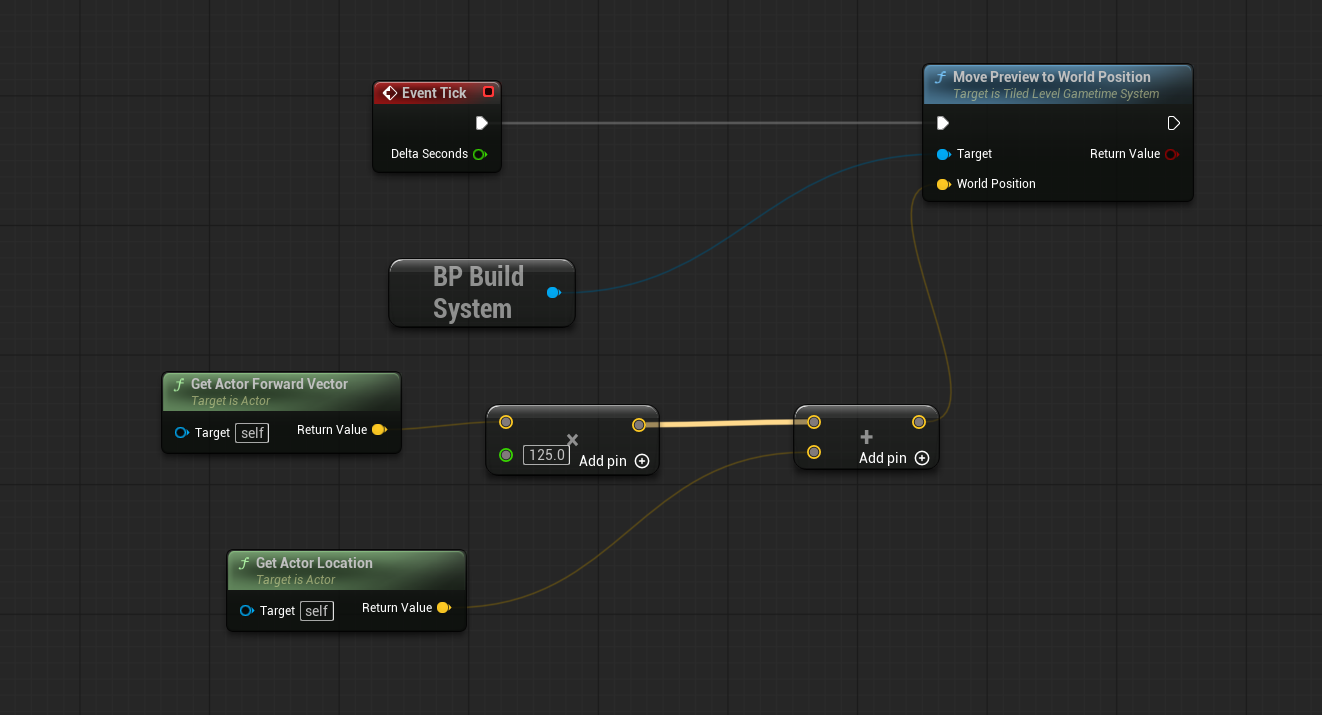
Tick: Try move preview in front of your player character
-
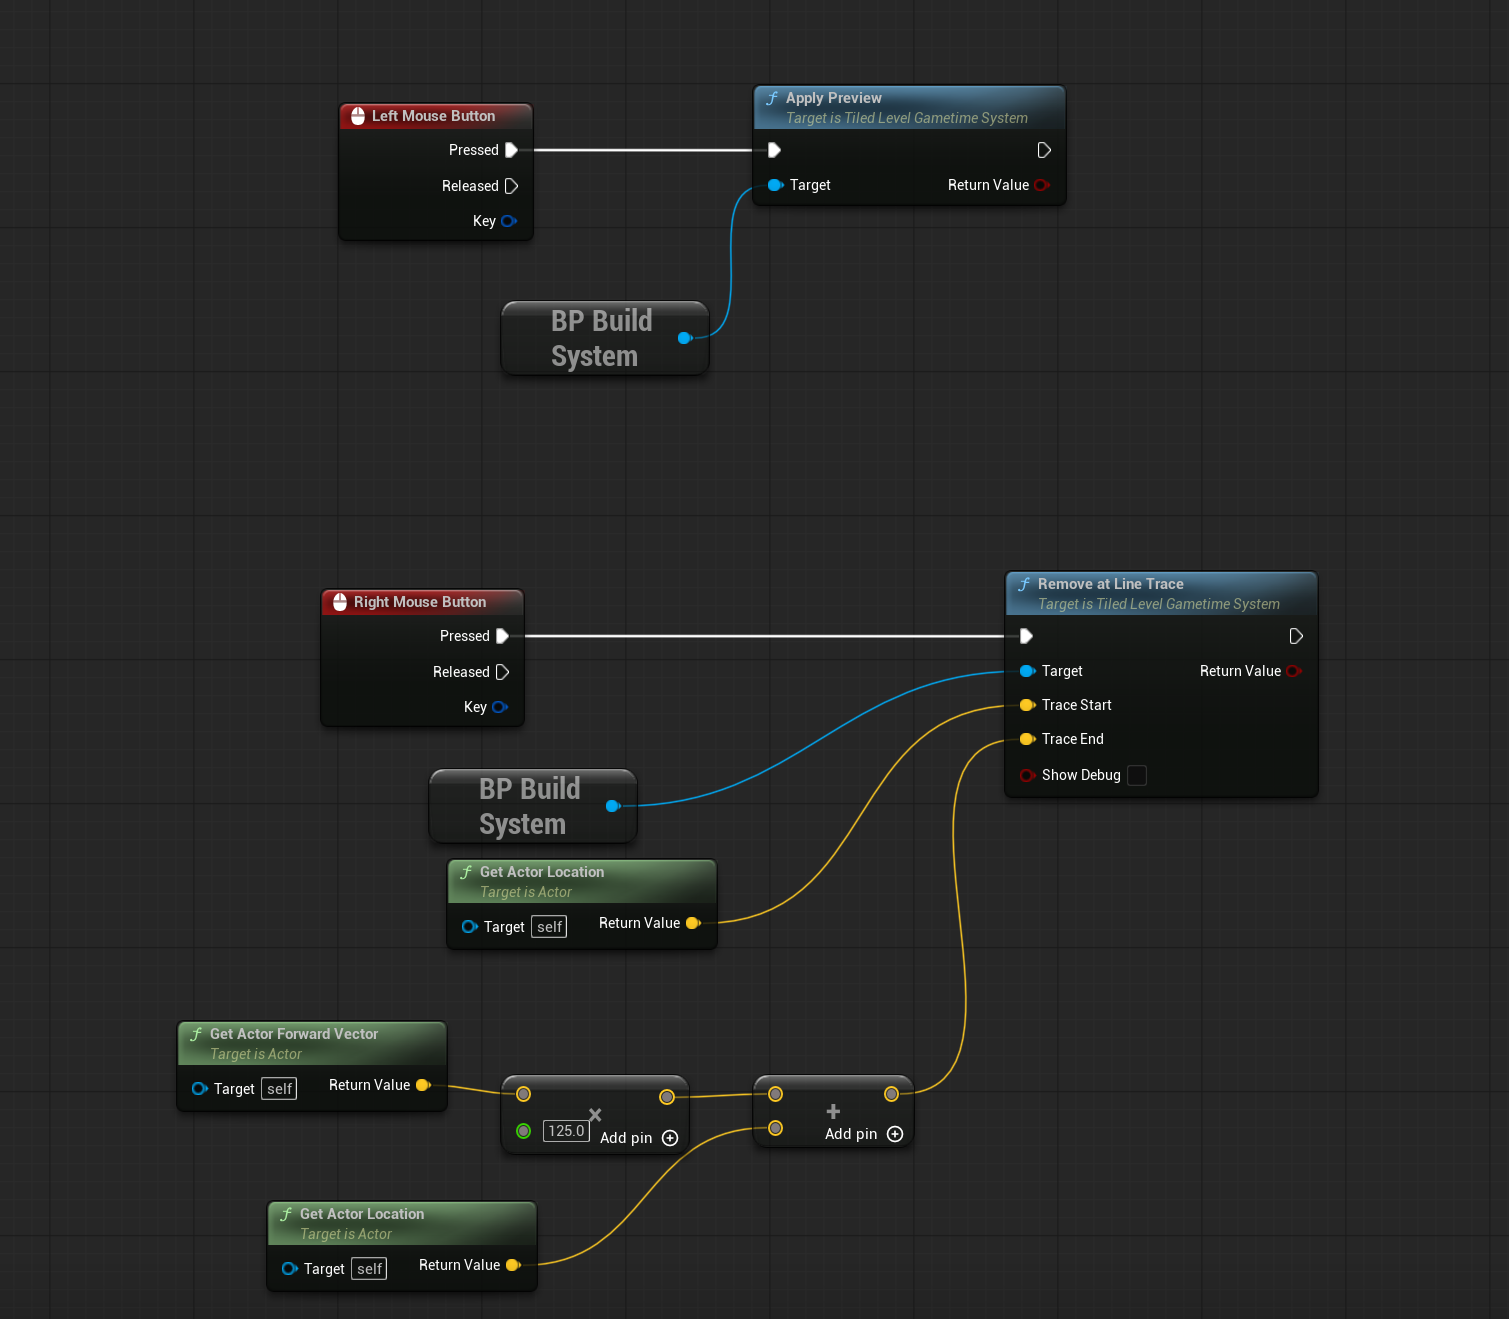
Add input event Left Mouse Button to Apply Preview
-
Add input event Right Mouse Button to try to remove instance in front of your character.
-
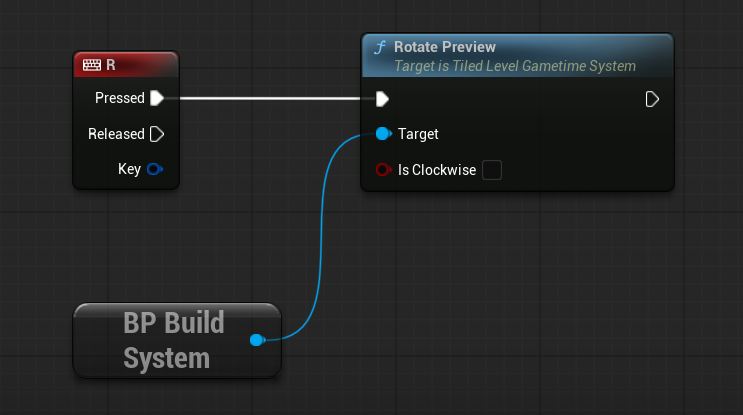
Add input event R to rotate preview item.
-
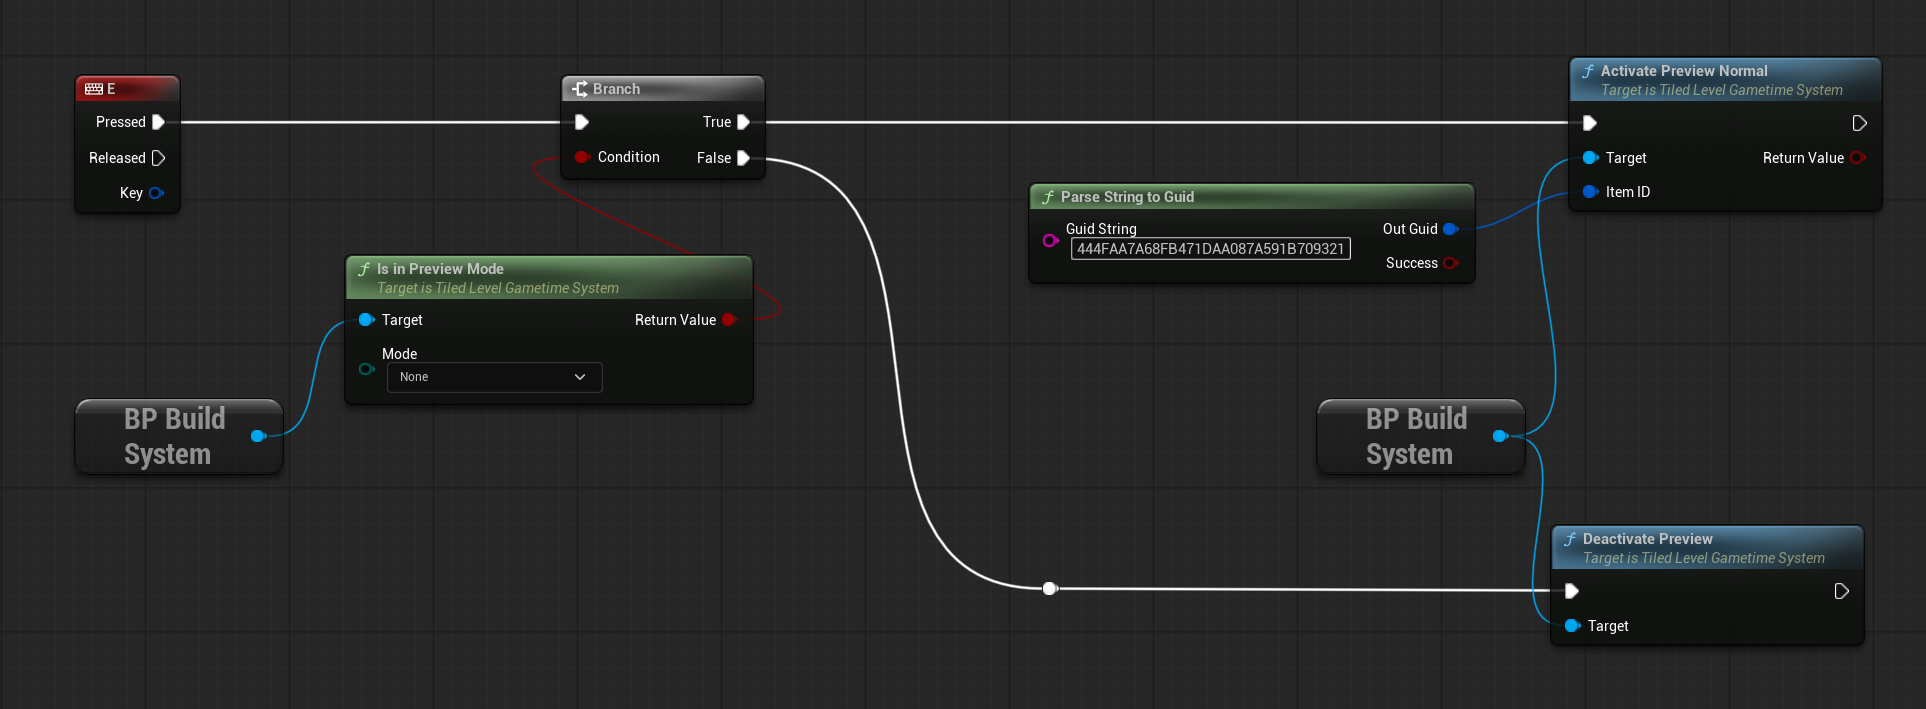
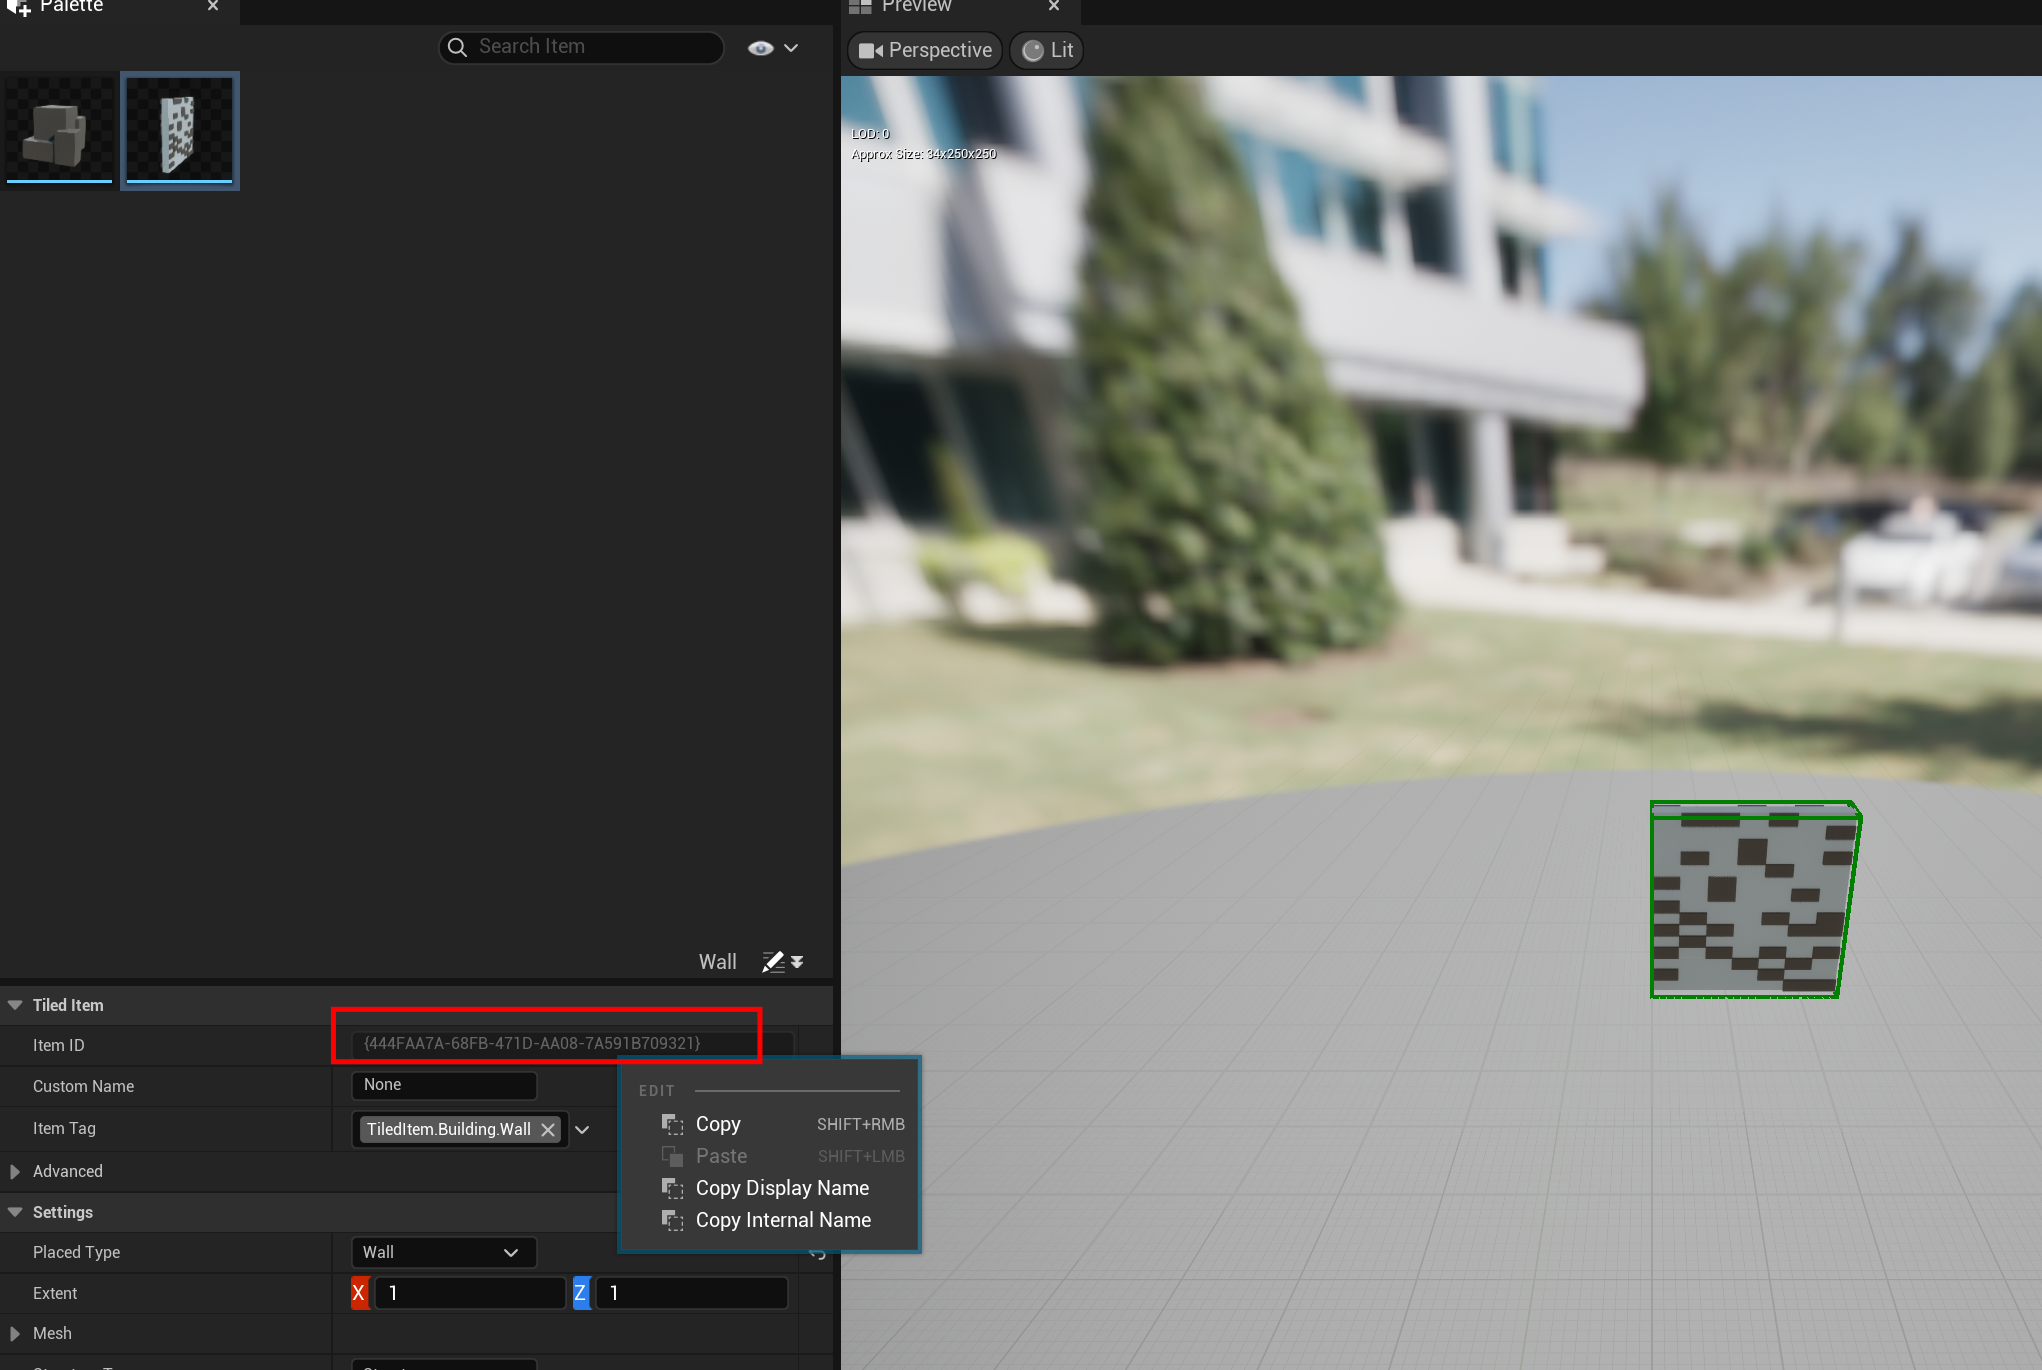
Add input evenv E to toggle the normal preview mode. You need to set a item ID to activate normal preview mode. Try copy the ID from your item set.
Setup the preview strategy
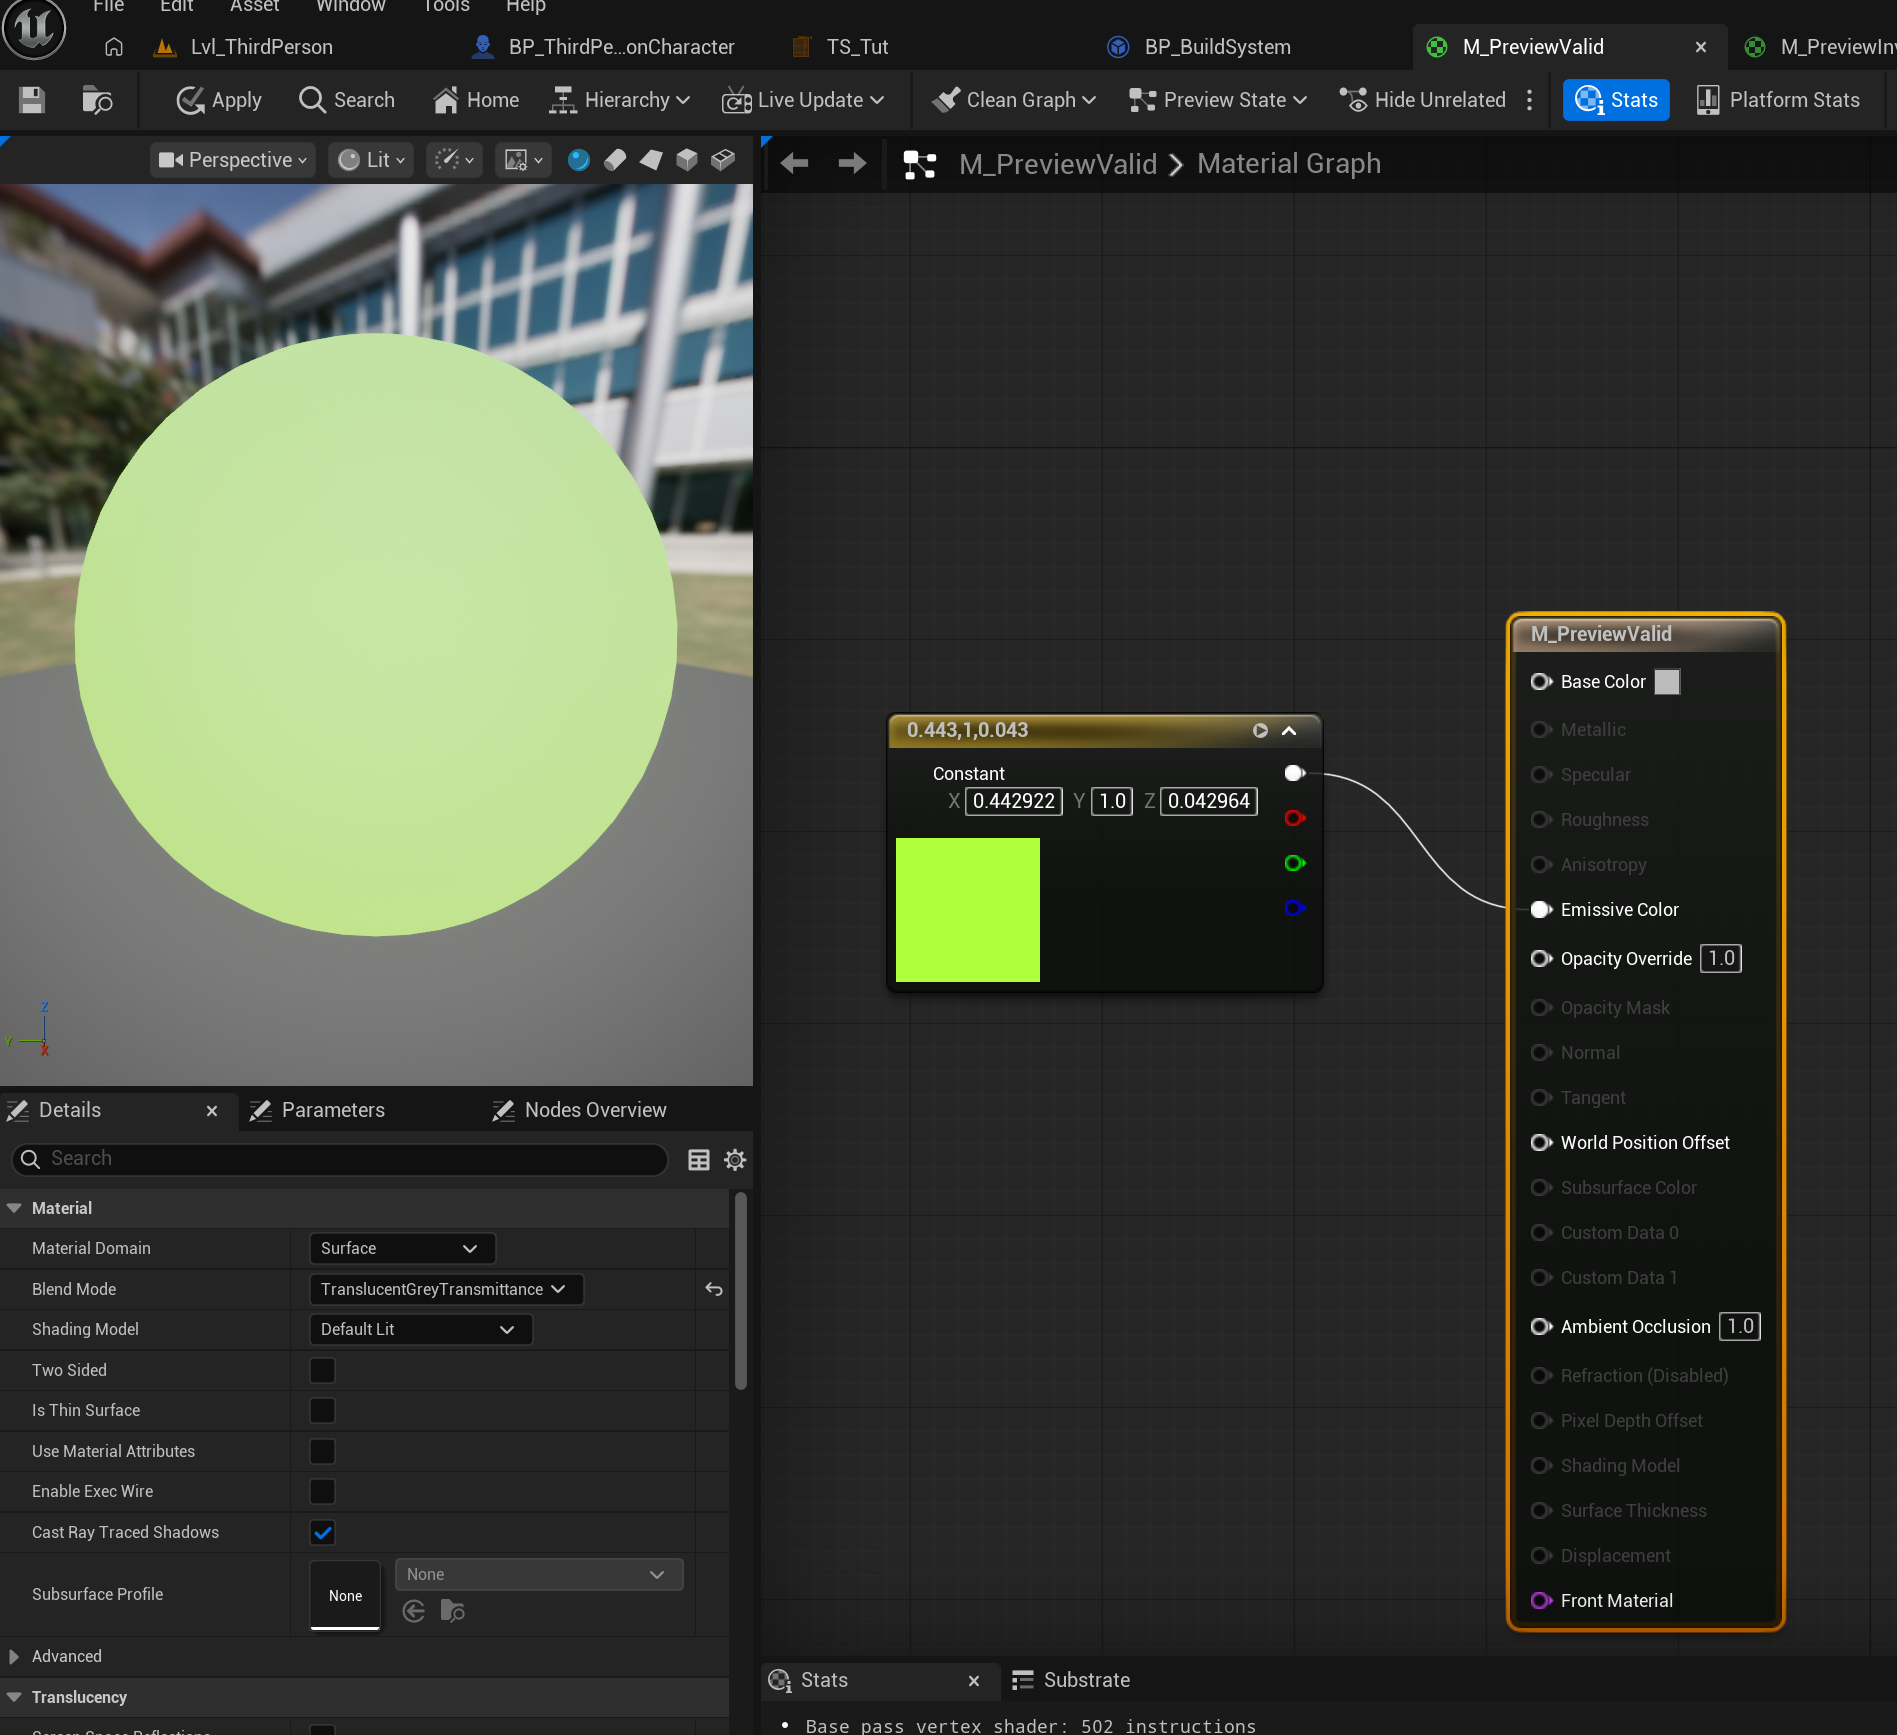
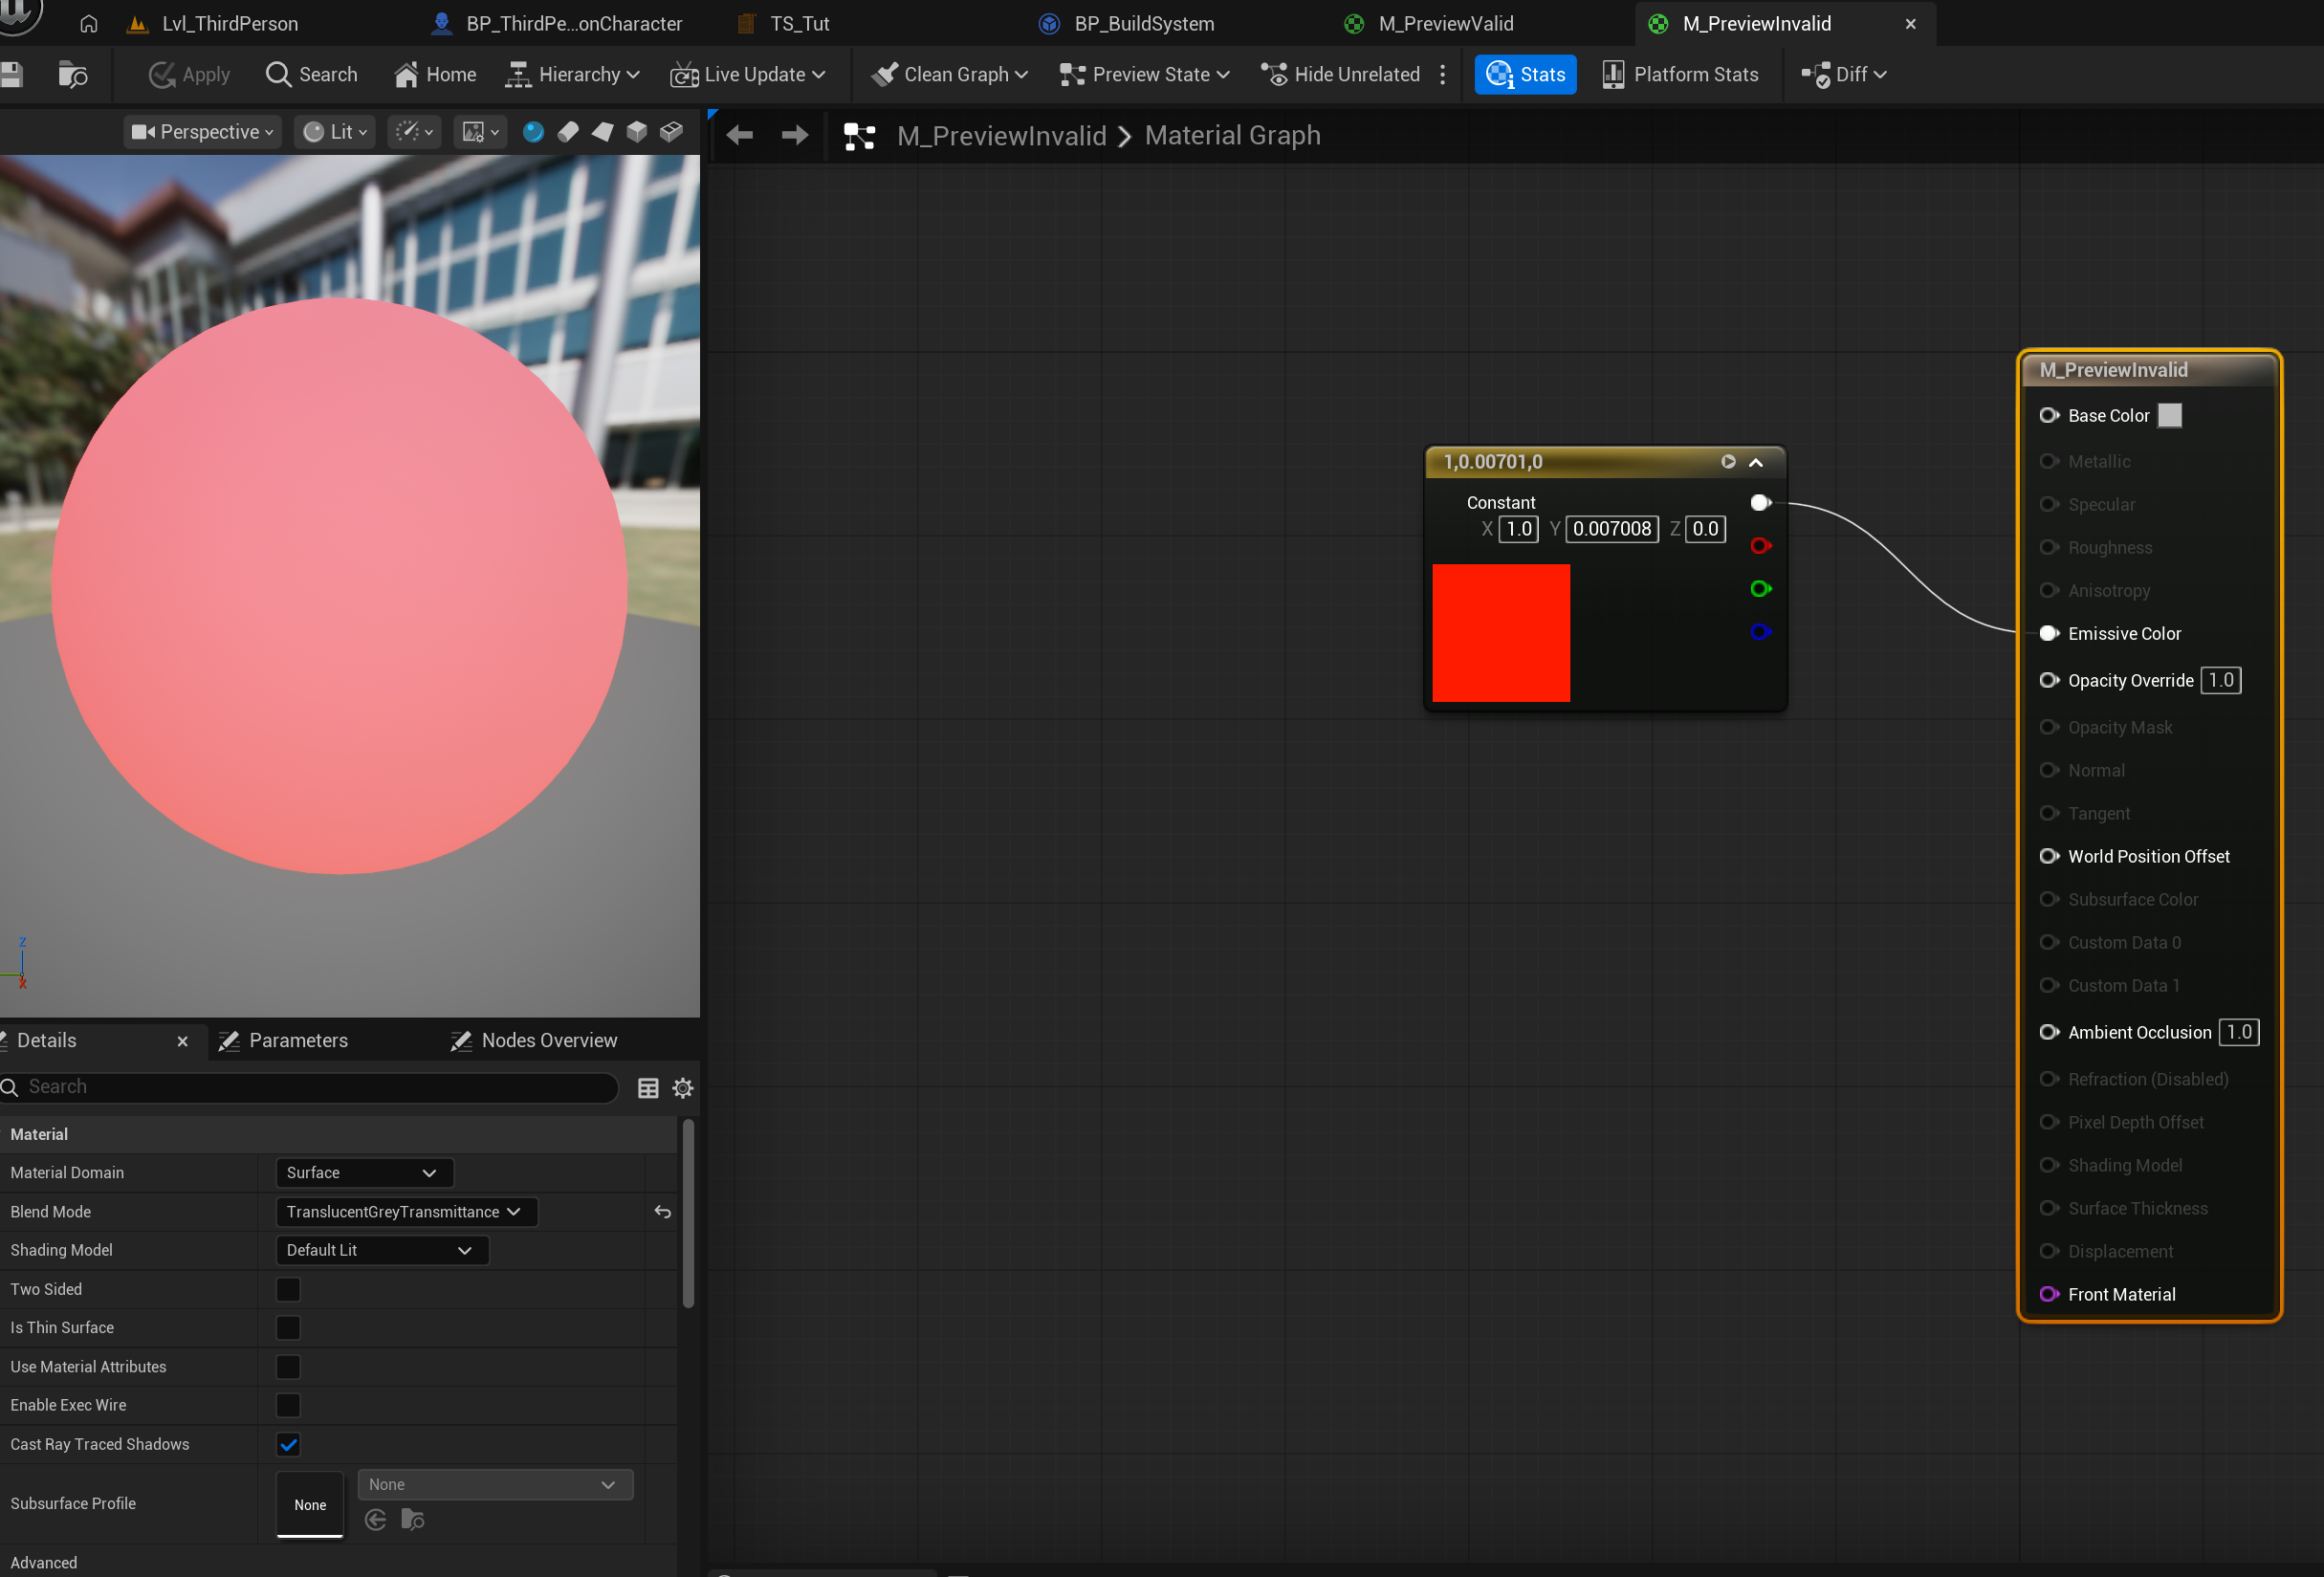
Go back to your BP_BuildSystem, change the preview strategy to Material Override. Create two material for the preview meshes to indicate your player it’s valid / invalid to build this item here.
Such as this:
-
M_PreviewValid
-
M_PreviewInvalid

Create basic UI
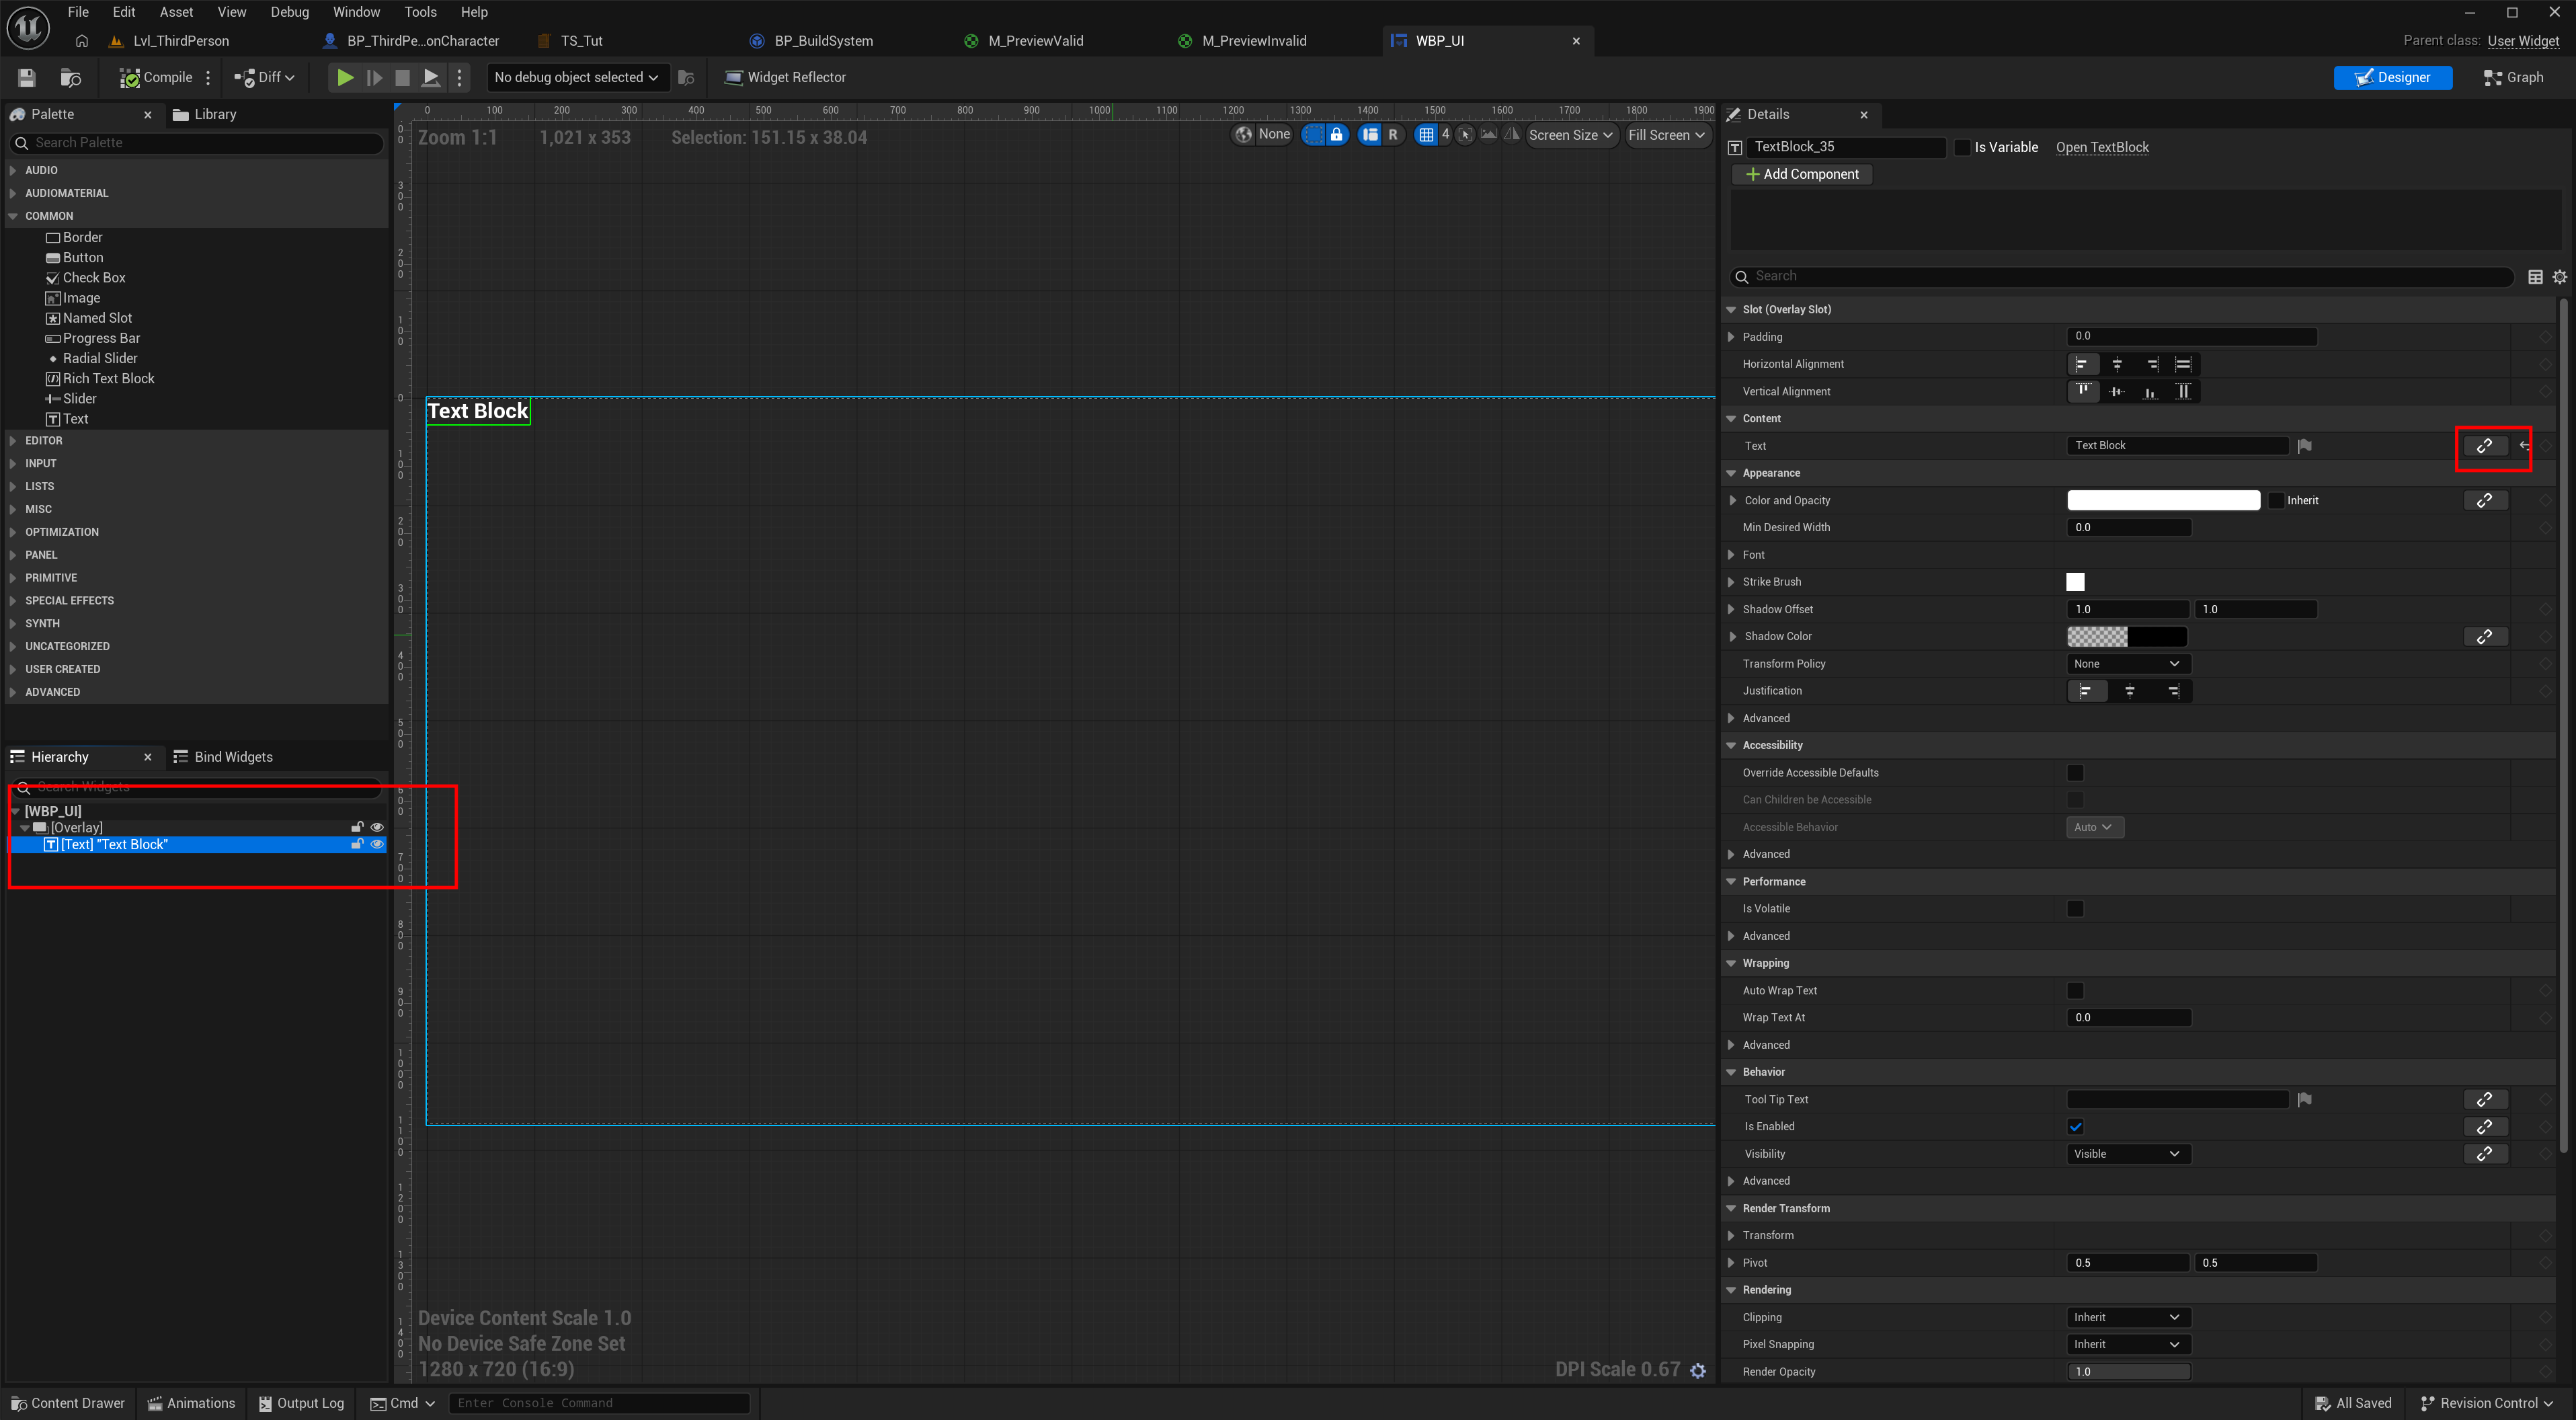
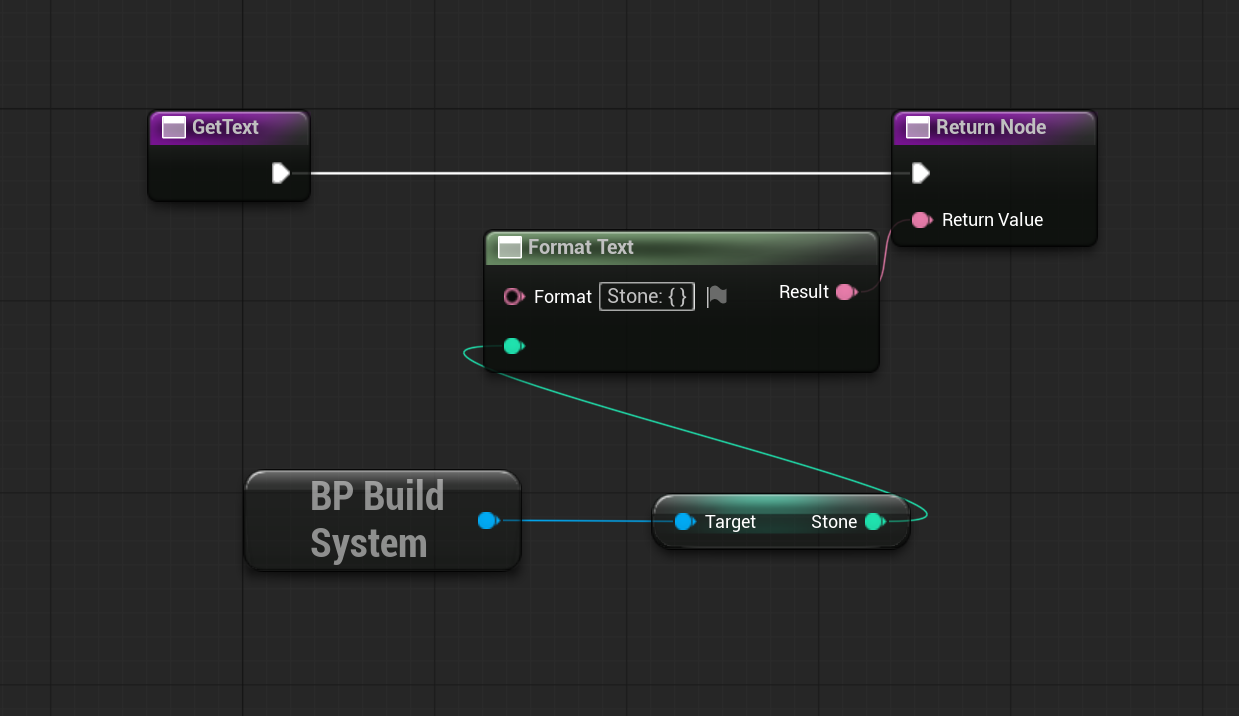
- Create an UserWidget called WBP_UI. Place 1 TextBlock in Overlay, and bind their GetText function as below.
- Enable this widget in BP_ThirdPersonCharacter in begin play.

Create the pickaxe
- Create a actor called BP_Pickaxe, add a box and a static mesh component to DefaultSceneRoot.
- Set the mesh to Pickaxe, and adjust the location of box.

- Add simple logic when your player overlap with the box, enable HasPickaxe and destroy this actor.

Level setup
- Drag your TS_Tut the current level, paint some instance as you like.
- Put a BP_Pickaxe to let player to pick it up.

-
Initialize this gametime system in Level blueprint.
- Open level blueprint
- Select your TiledLevel Actor in this level, to add reference to the level blueprint.
- Set this reference to one of the bounded level in Initialize Bounded System.
For more information check out Initialization.


Done!
Now hit play and have fun! For further tweaking, you can add some sound or visual feedback when you faild to build or remove something. Just add some new logic after on item built or on item removed!